 日本語
日本語


AmneziaWG
Keywords
| Keyword | Definition |
|---|---|
| 🛡️ AmneziaWG | A fork of WireGuard that randomizes packet headers, sizes, and timing to resist Deep Packet Inspection while keeping the same audited cryptography. It is the protocol that runs on your server. |
| 🚀 AmneziaWG 2.0 | The current major version that uses dynamic header ranges (instead of fixed values), adds data-level padding (S4), and supports Custom Protocol Signature decoy packets for stronger DPI evasion. |
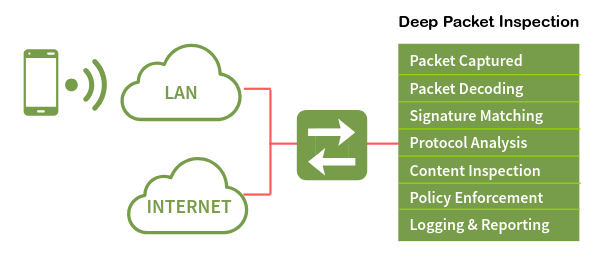
| 🔍 Deep Packet Inspection (DPI) | A network filtering technique used by ISPs and governments to identify and block VPN traffic by analyzing packet headers, sizes, and handshake patterns. AmneziaWG is specifically designed to defeat it. |
| ⚡ WireGuard | A fast, modern VPN protocol with a small codebase and kernel-level performance. It is easily fingerprinted by DPI systems due to its fixed packet structure, which is what AmneziaWG was built to fix. |
| 🏠 Self-hosted VPN | A VPN you deploy and manage on your own server (typically a VPS) rather than subscribing to a commercial provider. You control the keys, config, and infrastructure. |
| 🐧 DKMS (Dynamic Kernel Module Support) | A Linux framework that automatically recompiles kernel modules when the system kernel is updated. The AmneziaWG installer uses DKMS to build the high-performance kernel module. |
| 🎭 Obfuscation | The practice of disguising VPN traffic to look like ordinary internet traffic. AmneziaWG obfuscates at the transport layer by randomizing headers, adding padding, sending decoy packets, and firing junk packets. |
| 🔀 Split tunneling | A routing configuration where only specific traffic (e.g., blocked sites) goes through the VPN while the rest uses your direct connection. Useful in countries with partial censorship. |
| 🖥️ KVM vs LXC | KVM is full virtualization with a dedicated kernel, required for loading custom kernel modules like AmneziaWG. LXC is container-based virtualization that shares the host kernel and cannot load custom modules. |
| 🎪 CPS (Custom Protocol Signature) | An AmneziaWG 2.0 feature that sends decoy packets mimicking other protocols (QUIC, DNS, SIP) before the real handshake, fooling DPI systems into classifying the traffic as normal. |
Self-Host an AmneziaWG VPN Server — Complete Guide
![]()
![]()
AmneziaWG is a protocol designed to solve a specific problem: how do you get WireGuard’s speed when the networks you’re connecting through actively try to block it? It’s a fork of WireGuard built by the Amnezia VPN team, and it does one thing that the original doesn’t — it randomizes the transport layer so Deep Packet Inspection systems can’t fingerprint it. The encryption underneath stays exactly the same. What changes is how the packets look on the wire.
The broader landscape of VPN obfuscation has been an arms race for years. Tools like Shadowsocks, VLESS+Reality, and OpenVPN with obfs4 all attempt to disguise traffic in different ways — some as proxies, some as full tunnels, some with heavy performance costs. AmneziaWG sits in a specific niche: it’s a full VPN tunnel with WireGuard-level performance and built-in DPI resistance, all in one package. And since it’s open-source, you can self-host it on your own server.
But here’s the problem that makes this necessary. You set up WireGuard. It works perfectly — fast, clean, reliable. Then one day it stops. No error message, no timeout, no connection refused. The packets just vanish. That’s what DPI blocking looks like in practice: your tunnel is still running, your config is still correct, and nothing gets through. This is the reality in Russia (where WireGuard has roughly a 12% success rate), Iran (98% packet loss), and a growing list of countries including China, Egypt, UAE, Turkey, Belarus, Uzbekistan, Kazakhstan, Myanmar, and Pakistan.

Traditional alternatives don’t fully solve this. Shadowsocks is a proxy, not a full VPN tunnel — your DNS and non-TCP traffic still leak. OpenVPN with obfs4 works but carries roughly 25% performance overhead. VLESS+Reality offers strong obfuscation but is proxy-based and complex to configure. AmneziaWG fills the gap: a complete VPN tunnel with WireGuard’s speed and DPI resistance baked in.
This guide walks you through deploying a fully functional AmneziaWG 2.0 server on any KVM VPS in under 15 minutes using a single community installer script. By the end, you’ll have a working VPN tunnel you can connect to from any device. The steps are provider-agnostic — they work on any VPS with root SSH access, whether that’s from AlexHost, AvaHost, or elsewhere. This is written for intermediate tech users who are comfortable with SSH and basic Linux commands.
One clarification before we start: AmneziaWG is the protocol. AmneziaVPN is the client app that connects to it. They’re related but distinct — like TLS is to your browser. You’ll need the app to connect, but the protocol is what runs on your server.
But before we deploy anything, you need to understand what makes AmneziaWG different from WireGuard — and why that difference matters when DPI is watching.
What Is AmneziaWG? (The Mental Model)
WireGuard is elegant by design. It has a small codebase, uses modern cryptography, and runs in the Linux kernel for near-native performance. But that elegance comes with a visibility problem: every WireGuard packet carries the same fixed header structure, the same fixed packet sizes, and the same handshake pattern. To a Deep Packet Inspection system, a WireGuard tunnel has a signature as clear as a barcode. Once a DPI box learns that signature, it can drop every packet without blocking the port or closing the connection.
Think of it this way. WireGuard is like a courier who always wears the same uniform — fast, reliable, and efficient. But anyone watching the road learns to recognize that uniform and can stop the courier at any checkpoint. AmneziaWG is the same courier carrying the same packages, but they change uniforms at every checkpoint. Same person, same cargo, completely different appearance.
The version history matters here. AmneziaWG 1.x introduced custom headers that differed from WireGuard’s fixed values — it helped for a while, but DPI systems adapted. AmneziaWG 2.0, released in late 2025, randomizes everything: headers change per packet, padding varies per message, and decoy packets mimic other protocols before the real handshake begins. There is no universal signature to detect because every AmneziaWG 2.0 server generates its own unique parameter set. Each server speaks its own dialect.
When all obfuscation parameters are set to zero, AmneziaWG behaves identically to WireGuard — it’s fully backward compatible at the protocol level. But with parameters active (which is the default), it becomes something WireGuard cannot be: a fast VPN tunnel that DPI systems struggle to identify.
So how exactly does AmneziaWG scramble its traffic? Let’s look at the four obfuscation layers that make DPI blind — and why they add almost no speed cost.
How AmneziaWG Hides From DPI (Without Losing Speed)
AmneziaWG 2.0 uses four layered obfuscation techniques that work together. Each one targets a different way DPI systems identify VPN traffic. Together, they make every server’s traffic look unique.
Dynamic Headers (H1–H4)
WireGuard uses fixed 32-bit message type identifiers:
- 1 — for initiation
- 2 — for response
- 3 — for cookie reply
- 4 — for data
A DPI box scanning traffic just looks for these values. AmneziaWG 2.0 replaces each fixed value with a random number drawn from a configured range. The initiation header (H1) might be any value between 234567 and 345678. The response header (H2) might be between 3456789 and 4567890. These ranges never overlap — the protocol still needs to distinguish packet types internally — but to an outside observer, there’s no single header value to latch onto. Every packet looks different from the last.
Random Padding (S1–S4)
WireGuard’s initiation packet is always exactly 148 bytes. Its response is always exactly 92 bytes. These fixed sizes are another fingerprint. AmneziaWG adds random padding to each packet type: the initiation becomes 148+S1 bytes, the response becomes 92+S2 bytes, the cookie reply becomes 64+S3 bytes, and every data packet gets S4 bytes of padding. S3 and S4 are new in version 2.0 — and S4 is the most significant addition because it touches every single data packet, making session-wide traffic analysis much harder.
There’s one critical constraint: S1+56 must not equal S2. Since the original size difference between initiation and response is 56 bytes (148−92), if the padding values happened to compensate for exactly that difference, the two padded packets would end up the same size — recreating the fingerprint AmneziaWG is trying to eliminate. The installer’s parameter generator enforces this constraint automatically.
Custom Protocol Signature (I1–I5)
Before the real WireGuard handshake begins, the AmneziaWG client sends up to five decoy packets that mimic other protocols — QUIC, DNS, SIP, or custom byte patterns. The server ignores these packets entirely. It just waits for the real handshake.
- A simple configuration: Sends 128 random bytes <r 128>.
- A sophisticated configuration: Sends bytes that look like a QUIC connection initiation (<b 0xc000000001><r 64><t>), complete with a Unix timestamp.
To a DPI system watching the session start, the first packets look like normal web traffic.
Junk Packets (Jc, Jmin, Jmax)
After the decoy packets, the client fires a configurable number of junk packets — pure noise with random sizes between Jmin and Jmax. These blur the timing and size profile of the session start, making it harder for DPI systems to identify where the real handshake begins.
The Speed Question
There’s a number that’s been circulating online: AmneziaWG has 65% overhead. That figure is real, but it refers to the userspace Go implementation — not the kernel module. The community installer used in this guide builds a DKMS kernel module, and the kernel module adds less than 12% overhead total — closer to 3% in real-world benchmarks. On an uncensored network, you’d see roughly 95 Mbps through WireGuard and 92 Mbps through AmneziaWG 2.0. In a censored network, the comparison is 92 Mbps versus zero.
The following table summarizes the parameters the installer generates automatically:
| Parameter | Generated Range | Example Value |
|---|---|---|
Jc (junk packet count) | 4–8 | 6 |
Jmin (min junk size) | 40–89 | 55 |
Jmax (max junk size) | Jmin+100 to Jmin+500 | 380 |
S1 (init padding) | 15–150 | 72 |
S2 (response padding) | 15–150, S1+56≠S2 | 56 |
S3 (cookie padding) | 8–55 | 32 |
S4 (data padding) | 4–27 | 16 |
H1 (init header range) | uint32 non-overlapping | 234567-345678 |
H2 (response header range) | uint32 non-overlapping | 3456789-4567890 |
H3 (cookie header range) | uint32 non-overlapping | 56789012-67890123 |
H4 (data header range) | uint32 non-overlapping | 456789012-567890123 |
I1 (CPS packet) | <r N> format | <r 128> |
You don’t need to set any of these manually. The installer generates cryptographically random, constraint-valid values every time.
Now that you know how the obfuscation works, let’s see how AmneziaWG stacks up against the alternatives you might be considering.
AmneziaWG vs Alternatives — Quick Decision Guide

| WireGuard | AmneziaWG 2.0 | OpenVPN+obfs4 | Shadowsocks | VLESS+Reality | |
|---|---|---|---|---|---|
| DPI resistance | Low | High | Medium | Medium | Very High |
| Speed overhead | ~4% | <12% (~3% real-world) | ~25% | ~8% | ~10% |
| Full VPN tunnel | Yes | Yes | Yes | No (proxy) | No (proxy) |
| Runs in kernel | Yes | Yes (DKMS) | No | No | No |
| Setup complexity | Low | Low (with installer) | High | Medium | High |
| Transport | UDP | UDP | TCP/UDP | TCP | TCP |
The decision rules are straightforward:
- No DPI in your country? Use plain WireGuard. It’s simpler and has a larger ecosystem.
- Need maximum DPI resistance and OK with a proxy? VLESS+Reality is the strongest option for obfuscation, but it’s not a full tunnel.
- Want both speed and a full tunnel with obfuscation? AmneziaWG 2.0 is the only option that delivers WireGuard-grade performance with real DPI resistance in a complete VPN tunnel.
- Already using OpenVPN+obfs4 and it still works? No urgent need to switch, but AmneziaWG will be noticeably faster.
This article focuses on AmneziaWG because it’s the only protocol that gives you a full tunnel, kernel-level performance, and built-in obfuscation — all configured by a single script.
If AmneziaWG is the right choice for your situation, here’s exactly what you need before we start deploying.
What You’ll Need Before Starting
Before running the installer, make sure your environment meets these requirements:
| Requirement | Detail | Why |
|---|---|---|
| OS | Ubuntu 24.04 LTS (clean install). Ubuntu 25.10 is experimental. Debian 12/13 work but may needcurl pre-installed. | The installer is tested and fully supported on Ubuntu 24.04. |
| VPS specs | 1 vCore, 1 GB RAM, 25 GB storage. Any $3–5/month plan works. | The installer needs ~2 GB disk and ~1 GB RAM during the DKMS build. The running VPN uses negligible resources. |
| Virtualization | KVM (not OpenVZ, not LXC). | AmneziaWG loads a kernel module via DKMS. LXC shares the host kernel and cannot load custom modules. |
| SSH access | Root or sudo user with password/key authentication. | The installer must run as root. |
| SSH port | Default 22, or pre-opened in UFW if using a non-standard port. | If SSH isn’t on port 22 and you don’t pre-open it, the installer’s firewall setup will lock you out. |
| Client app | Amnezia VPN >= 4.8.12.7 (all platforms). | AWG 2.0 parameters are not understood by older clients. The standard WireGuard client does not support AWG at all. |
⚠️ Warning: LXC containers are not supported. If your VPS uses LXC virtualization, the DKMS kernel module build will fail. You must use KVM or bare-metal. Check with your provider if you’re unsure.
⚠️ Warning: If your SSH runs on a non-standard port (anything other than 22), you must open it in UFW before running the installer:
sudo ufw allow YOUR_PORT/tcpReplace
YOUR_PORTwith your actual SSH port. The installer enables UFW with a default-deny policy — if your SSH port isn’t allowed, you’ll be locked out immediately.
💡 Tip: Wait 5–10 minutes after creating your VPS before running the installer. Cloud-init and background initialization processes can conflict with the
apt-getcalls the installer makes.
With your VPS ready and prerequisites confirmed, let’s deploy AmneziaWG 2.0 using the community installer script — the fastest and most transparent method.
Keywords
| Keyword | Definition |
|---|---|
| 🛡️ AmneziaWG | A fork of WireGuard that randomizes packet headers, sizes, and timing to resist Deep Packet Inspection while keeping the same audited cryptography. It is the protocol that runs on your server. |
| 🚀 AmneziaWG 2.0 | The current major version that uses dynamic header ranges (instead of fixed values), adds data-level padding (S4), and supports Custom Protocol Signature decoy packets for stronger DPI evasion. |
| 🔍 Deep Packet Inspection (DPI) | A network filtering technique used by ISPs and governments to identify and block VPN traffic by analyzing packet headers, sizes, and handshake patterns. AmneziaWG is specifically designed to defeat it. |
| ⚡ WireGuard | A fast, modern VPN protocol with a small codebase and kernel-level performance. It is easily fingerprinted by DPI systems due to its fixed packet structure, which is what AmneziaWG was built to fix. |
| 🏠 Self-hosted VPN | A VPN you deploy and manage on your own server (typically a VPS) rather than subscribing to a commercial provider. You control the keys, config, and infrastructure. |
| 🐧 DKMS (Dynamic Kernel Module Support) | A Linux framework that automatically recompiles kernel modules when the system kernel is updated. The AmneziaWG installer uses DKMS to build the high-performance kernel module. |
| 🎭 Obfuscation | The practice of disguising VPN traffic to look like ordinary internet traffic. AmneziaWG obfuscates at the transport layer by randomizing headers, adding padding, sending decoy packets, and firing junk packets. |
| 🔀 Split tunneling | A routing configuration where only specific traffic (e.g., blocked sites) goes through the VPN while the rest uses your direct connection. Useful in countries with partial censorship. |
| 🖥️ KVM vs LXC | KVM is full virtualization with a dedicated kernel, required for loading custom kernel modules like AmneziaWG. LXC is container-based virtualization that shares the host kernel and cannot load custom modules. |
| 🎪 CPS (Custom Protocol Signature) | An AmneziaWG 2.0 feature that sends decoy packets mimicking other protocols (QUIC, DNS, SIP) before the real handshake, fooling DPI systems into classifying the traffic as normal. |
Self-Host an AmneziaWG VPN Server — Complete Guide
![]()
![]()
AmneziaWG is a protocol designed to solve a specific problem: how do you get WireGuard’s speed when the networks you’re connecting through actively try to block it? It’s a fork of WireGuard built by the Amnezia VPN team, and it does one thing that the original doesn’t — it randomizes the transport layer so Deep Packet Inspection systems can’t fingerprint it. The encryption underneath stays exactly the same. What changes is how the packets look on the wire.
The broader landscape of VPN obfuscation has been an arms race for years. Tools like Shadowsocks, VLESS+Reality, and OpenVPN with obfs4 all attempt to disguise traffic in different ways — some as proxies, some as full tunnels, some with heavy performance costs. AmneziaWG sits in a specific niche: it’s a full VPN tunnel with WireGuard-level performance and built-in DPI resistance, all in one package. And since it’s open-source, you can self-host it on your own server.
But here’s the problem that makes this necessary. You set up WireGuard. It works perfectly — fast, clean, reliable. Then one day it stops. No error message, no timeout, no connection refused. The packets just vanish. That’s what DPI blocking looks like in practice: your tunnel is still running, your config is still correct, and nothing gets through. This is the reality in Russia (where WireGuard has roughly a 12% success rate), Iran (98% packet loss), and a growing list of countries including China, Egypt, UAE, Turkey, Belarus, Uzbekistan, Kazakhstan, Myanmar, and Pakistan.
Traditional alternatives don’t fully solve this. Shadowsocks is a proxy, not a full VPN tunnel — your DNS and non-TCP traffic still leak. OpenVPN with obfs4 works but carries roughly 25% performance overhead. VLESS+Reality offers strong obfuscation but is proxy-based and complex to configure. AmneziaWG fills the gap: a complete VPN tunnel with WireGuard’s speed and DPI resistance baked in.
This guide walks you through deploying a fully functional AmneziaWG 2.0 server on any KVM VPS in under 15 minutes using a single community installer script. By the end, you’ll have a working VPN tunnel you can connect to from any device. The steps are provider-agnostic — they work on any VPS with root SSH access, whether that’s from AlexHost, AvaHost, or elsewhere. This is written for intermediate tech users who are comfortable with SSH and basic Linux commands.
One clarification before we start: AmneziaWG is the protocol. AmneziaVPN is the client app that connects to it. They’re related but distinct — like TLS is to your browser. You’ll need the app to connect, but the protocol is what runs on your server.
But before we deploy anything, you need to understand what makes AmneziaWG different from WireGuard — and why that difference matters when DPI is watching.
What Is AmneziaWG? (The Mental Model)
WireGuard is elegant by design. It has a small codebase, uses modern cryptography, and runs in the Linux kernel for near-native performance. But that elegance comes with a visibility problem: every WireGuard packet carries the same fixed header structure, the same fixed packet sizes, and the same handshake pattern. To a Deep Packet Inspection system, a WireGuard tunnel has a signature as clear as a barcode. Once a DPI box learns that signature, it can drop every packet without blocking the port or closing the connection.
Think of it this way. WireGuard is like a courier who always wears the same uniform — fast, reliable, and efficient. But anyone watching the road learns to recognize that uniform and can stop the courier at any checkpoint. AmneziaWG is the same courier carrying the same packages, but they change uniforms at every checkpoint. Same person, same cargo, completely different appearance.
The version history matters here. AmneziaWG 1.x introduced custom headers that differed from WireGuard’s fixed values — it helped for a while, but DPI systems adapted. AmneziaWG 2.0, released in late 2025, randomizes everything: headers change per packet, padding varies per message, and decoy packets mimic other protocols before the real handshake begins. There is no universal signature to detect because every AmneziaWG 2.0 server generates its own unique parameter set. Each server speaks its own dialect.
When all obfuscation parameters are set to zero, AmneziaWG behaves identically to WireGuard — it’s fully backward compatible at the protocol level. But with parameters active (which is the default), it becomes something WireGuard cannot be: a fast VPN tunnel that DPI systems struggle to identify.
So how exactly does AmneziaWG scramble its traffic? Let’s look at the four obfuscation layers that make DPI blind — and why they add almost no speed cost.
How AmneziaWG Hides From DPI (Without Losing Speed)
AmneziaWG 2.0 uses four layered obfuscation techniques that work together. Each one targets a different way DPI systems identify VPN traffic. Together, they make every server’s traffic look unique.
Dynamic Headers (H1–H4)
WireGuard uses fixed 32-bit message type identifiers:
- 1 — for initiation
- 2 — for response
- 3 — for cookie reply
- 4 — for data
A DPI box scanning traffic just looks for these values. AmneziaWG 2.0 replaces each fixed value with a random number drawn from a configured range. The initiation header (H1) might be any value between 234567 and 345678. The response header (H2) might be between 3456789 and 4567890. These ranges never overlap — the protocol still needs to distinguish packet types internally — but to an outside observer, there’s no single header value to latch onto. Every packet looks different from the last.
Random Padding (S1–S4)
WireGuard’s initiation packet is always exactly 148 bytes. Its response is always exactly 92 bytes. These fixed sizes are another fingerprint. AmneziaWG adds random padding to each packet type: the initiation becomes 148+S1 bytes, the response becomes 92+S2 bytes, the cookie reply becomes 64+S3 bytes, and every data packet gets S4 bytes of padding. S3 and S4 are new in version 2.0 — and S4 is the most significant addition because it touches every single data packet, making session-wide traffic analysis much harder.
There’s one critical constraint: S1+56 must not equal S2. Since the original size difference between initiation and response is 56 bytes (148−92), if the padding values happened to compensate for exactly that difference, the two padded packets would end up the same size — recreating the fingerprint AmneziaWG is trying to eliminate. The installer’s parameter generator enforces this constraint automatically.
Custom Protocol Signature (I1–I5)
Before the real WireGuard handshake begins, the AmneziaWG client sends up to five decoy packets that mimic other protocols — QUIC, DNS, SIP, or custom byte patterns. The server ignores these packets entirely. It just waits for the real handshake.
- A simple configuration: Sends 128 random bytes <r 128>.
- A sophisticated configuration: Sends bytes that look like a QUIC connection initiation (<b 0xc000000001><r 64><t>), complete with a Unix timestamp.
To a DPI system watching the session start, the first packets look like normal web traffic.
Junk Packets (Jc, Jmin, Jmax)
After the decoy packets, the client fires a configurable number of junk packets — pure noise with random sizes between Jmin and Jmax. These blur the timing and size profile of the session start, making it harder for DPI systems to identify where the real handshake begins.
The Speed Question
There’s a number that’s been circulating online: AmneziaWG has 65% overhead. That figure is real, but it refers to the userspace Go implementation — not the kernel module. The community installer used in this guide builds a DKMS kernel module, and the kernel module adds less than 12% overhead total — closer to 3% in real-world benchmarks. On an uncensored network, you’d see roughly 95 Mbps through WireGuard and 92 Mbps through AmneziaWG 2.0. In a censored network, the comparison is 92 Mbps versus zero.
The following table summarizes the parameters the installer generates automatically:
| Parameter | Generated Range | Example Value |
|---|---|---|
Jc (junk packet count) | 4–8 | 6 |
Jmin (min junk size) | 40–89 | 55 |
Jmax (max junk size) | Jmin+100 to Jmin+500 | 380 |
S1 (init padding) | 15–150 | 72 |
S2 (response padding) | 15–150, S1+56≠S2 | 56 |
S3 (cookie padding) | 8–55 | 32 |
S4 (data padding) | 4–27 | 16 |
H1 (init header range) | uint32 non-overlapping | 234567-345678 |
H2 (response header range) | uint32 non-overlapping | 3456789-4567890 |
H3 (cookie header range) | uint32 non-overlapping | 56789012-67890123 |
H4 (data header range) | uint32 non-overlapping | 456789012-567890123 |
I1 (CPS packet) | <r N> format | <r 128> |
You don’t need to set any of these manually. The installer generates cryptographically random, constraint-valid values every time.
Now that you know how the obfuscation works, let’s see how AmneziaWG stacks up against the alternatives you might be considering.
AmneziaWG vs Alternatives — Quick Decision Guide
| WireGuard | AmneziaWG 2.0 | OpenVPN+obfs4 | Shadowsocks | VLESS+Reality | |
|---|---|---|---|---|---|
| DPI resistance | Low | High | Medium | Medium | Very High |
| Speed overhead | ~4% | <12% (~3% real-world) | ~25% | ~8% | ~10% |
| Full VPN tunnel | Yes | Yes | Yes | No (proxy) | No (proxy) |
| Runs in kernel | Yes | Yes (DKMS) | No | No | No |
| Setup complexity | Low | Low (with installer) | High | Medium | High |
| Transport | UDP | UDP | TCP/UDP | TCP | TCP |
The decision rules are straightforward:
- No DPI in your country? Use plain WireGuard. It’s simpler and has a larger ecosystem.
- Need maximum DPI resistance and OK with a proxy? VLESS+Reality is the strongest option for obfuscation, but it’s not a full tunnel.
- Want both speed and a full tunnel with obfuscation? AmneziaWG 2.0 is the only option that delivers WireGuard-grade performance with real DPI resistance in a complete VPN tunnel.
- Already using OpenVPN+obfs4 and it still works? No urgent need to switch, but AmneziaWG will be noticeably faster.
This article focuses on AmneziaWG because it’s the only protocol that gives you a full tunnel, kernel-level performance, and built-in obfuscation — all configured by a single script.
If AmneziaWG is the right choice for your situation, here’s exactly what you need before we start deploying.
What You’ll Need Before Starting
Before running the installer, make sure your environment meets these requirements:
| Requirement | Detail | Why |
|---|---|---|
| OS | Ubuntu 24.04 LTS (clean install). Ubuntu 25.10 is experimental. Debian 12/13 work but may needcurl pre-installed. | The installer is tested and fully supported on Ubuntu 24.04. |
| VPS specs | 1 vCore, 1 GB RAM, 25 GB storage. Any $3–5/month plan works. | The installer needs ~2 GB disk and ~1 GB RAM during the DKMS build. The running VPN uses negligible resources. |
| Virtualization | KVM (not OpenVZ, not LXC). | AmneziaWG loads a kernel module via DKMS. LXC shares the host kernel and cannot load custom modules. |
| SSH access | Root or sudo user with password/key authentication. | The installer must run as root. |
| SSH port | Default 22, or pre-opened in UFW if using a non-standard port. | If SSH isn’t on port 22 and you don’t pre-open it, the installer’s firewall setup will lock you out. |
| Client app | Amnezia VPN >= 4.8.12.7 (all platforms). | AWG 2.0 parameters are not understood by older clients. The standard WireGuard client does not support AWG at all. |
⚠️ Warning: LXC containers are not supported. If your VPS uses LXC virtualization, the DKMS kernel module build will fail. You must use KVM or bare-metal. Check with your provider if you’re unsure.
⚠️ Warning: If your SSH runs on a non-standard port (anything other than 22), you must open it in UFW before running the installer:
sudo ufw allow YOUR_PORT/tcpReplace
YOUR_PORTwith your actual SSH port. The installer enables UFW with a default-deny policy — if your SSH port isn’t allowed, you’ll be locked out immediately.
💡 Tip: Wait 5–10 minutes after creating your VPS before running the installer. Cloud-init and background initialization processes can conflict with the
apt-getcalls the installer makes.
With your VPS ready and prerequisites confirmed, let’s deploy AmneziaWG 2.0 using the community installer script — the fastest and most transparent method.
キーワード
| キーワード | 定義 |
|---|---|
| 🛡️ AmneziaWG | パケットヘッダー、サイズ、送信時間をランダム化して深層パケット検査に対抗しながら、同じ証明された暗号化を維持するWireGuardのフォークです。これはあなたのサーバー上で動作するプロトコルです。 |
| 🚀 AmneziaWG 2.0 | 動的ヘッダー範囲(固定値の代わりに)を使用し、データレベルのパディング(S4)を追加し、より強力なDPI回避のためにカスタムプロトコル署名を持つ代替パケットをサポートする現在のメインバージョンです。 |
| 🔍 深層パケット検査 (DPI) | ISPや政府機関がVPNトラフィックを特定し、ブロックするためにパケットヘッダー、サイズ、ハンドシェイクパターンを分析するために使用するネットワークフィルタリング技術です。AmneziaWGはこれに対抗するために特別に設計されています。 |
| ⚡ WireGuard | 小さなコードベースとカーネルレベルのパフォーマンスを持つ高速で現代的なVPNプロトコルです。固定パケット構造のため、DPIシステムによって容易に識別されますが、これはAmneziaWGで対処されています。 |
| 🏠 セルフホストVPN | 商業プロバイダーに加入するのではなく、自分のサーバー(通常はVPS)上に展開し管理するVPNです。キー、構成、インフラストラクチャを制御します。 |
| 🐧 DKMS (Dynamic Kernel Module Support) | システムカーネルが更新されると、自動的にカーネルモジュールを再コンパイルするLinuxフレームワークです。AmneziaWGインストーラーは、DKMSを使用して高性能のカーネルモジュールを構築します。 |
| 🎭 難読化 | VPNトラフィックを通常のインターネットトラフィックのように見せるために隠す行為です。AmneziaWGは、ヘッダーをランダム化し、パディングを追加し、代替パケットを送信し、ジャンクパケットを生成することでトランスポート層で難読化します。 |
| 🔀 スプリットトンネリング | 特定のトラフィック(例:ブロックされたサイト)のみがVPNを通過し、他のトラフィックは直接接続を使用するルーティング構成です。部分的な検閲のある国で便利です。 |
| 🖥️ KVM vs LXC | KVMは、AmneziaWGのようなカスタムカーネルモジュールを読み込むために必要な専用カーネルを持つ完全仮想化です。LXCはホストの共有カーネルを使用するコンテナ仮想化で、カスタムモジュールを読み込むことができません。 |
| 🎪 CPS (Custom Protocol Signature) | AmneziaWG 2.0の機能で、実際のハンドシェイクの前に他のプロトコル(QUIC、DNS、SIP)を模倣する代替パケットを送信し、DPIシステムを誤解させてトラフィックを通常のものとして分類します。 |
セルフデプロイ型AmneziaWG VPNサーバー — 完全ガイド
![]()
![]()
AmneziaWGは、接続するネットワークが積極的にブロックしようとする場合にWireGuardの速度をどのように達成するかという特定の問題を解決するために設計されたプロトコルです。これはAmnezia VPNチームによって作成されたWireGuardのフォークであり、元のものが行わないことを行います — トランスポート層をランダム化して深層パケット検査システムがそれを特定できないようにします。暗号化は全く同じままです。ネットワーク内のパケットの外観だけが変わります。
VPNの難読化の広範な風景は、何年にもわたって武器競争でした。Shadowsocks、VLESS+Reality、OpenVPN with obfs4のようなツールは、さまざまな方法でトラフィックを隠そうとします — 一部はプロキシとして、一部は完全なトンネルとして、一部は高いパフォーマンスコストを伴います。AmneziaWGは特定のニッチを占めています:それはWireGuardレベルのパフォーマンスと組み込みのDPI保護を持つ完全なVPNトンネルであり、すべてが1つのパッケージにまとめられています。そして、オープンソースであるため、自分のサーバーに展開できます。
しかし、これが必要になる問題があります。WireGuardを設定します。それは完璧に機能します — 高速、クリーン、信頼性があります。すると、ある日、それが停止します。エラーメッセージもタイムアウトも接続拒否もありません。パケットがただ消えます。これが実際のDPIブロッキングの姿です:トンネルはまだ動作しており、構成はまだ正しいのに、何も通過しません。これはロシア(WireGuardの成功率は約12%)、イラン(98%のパケット損失)、中国、エジプト、UAE、トルコ、ベラルーシ、ウズベキスタン、カザフスタン、ミャンマー、パキスタンを含む増え続ける国々の現実です。

従来の代替手段はこの問題を完全には解決しません。Shadowsocksはプロキシであり、完全なVPNトンネルではありません — DNSや非TCPトラフィックはまだ漏れます。OpenVPN with obfs4は機能しますが、約25%のパフォーマンスオーバーヘッドがあります。VLESS+Realityは強力な難読化を提供しますが、プロキシベースであり、設定が複雑です。AmneziaWGはそのギャップを埋めます:それはWireGuardレベルのパフォーマンスと組み込みのDPI保護を持つ完全なVPNトンネルです。
このガイドでは、KVM VPS上に完全に機能するAmneziaWG 2.0サーバーを15分以内に単一のコミュニティインストーラスクリプトを使用して展開する方法を説明します。最終的には、任意のデバイスから接続できる作業VPNトンネルが得られます。手順はプロバイダーに依存せず、SSHアクセスとルート権限を持つ任意のVPSで機能します。これは、SSHや基本的なLinuxコマンドを使いこなす中級レベルの技術スキルを持つユーザー向けに書かれています。
始める前に1つの明確化があります:AmneziaWGはプロトコルです。AmneziaVPNはそれに接続するクライアントアプリケーションです。それらは関連していますが異なります — あなたのブラウザのためのTLSのように。接続するためのアプリケーションが必要ですが、プロトコルはあなたのサーバー上で動作します。
しかし、何かを展開する前に、AmneziaWGがWireGuardと異なる理由 — そしてその違いがDPIがあなたを見ているときに重要である理由を理解する必要があります。
AmneziaWGとは何ですか? (メンタルモデル)
WireGuardはその設計において優雅です。小さなコードベースを持ち、現代の暗号化を使用し、ほぼネイティブのパフォーマンスでLinuxカーネルで動作します。しかし、この優雅さには可視性の問題があります:すべてのWireGuardパケットは同じ固定ヘッダー構造、同じ固定パケットサイズ、同じハンドシェイクパターンを持っています。深層パケット検査システムにとって、WireGuardトンネルはバーコードのように明確な署名を持っています。この署名をDPIデバイスが学習すると、ポートをブロックしたり接続を閉じたりすることなく、すべてのパケットをドロップできます。

こう考えてみてください。WireGuardは常に同じ制服を着た宅配便のようです — 高速で信頼性が高く効率的です。しかし、道路を見ている誰もがその制服を認識するようになり、チェックポイントで宅配便を止めることができます。AmneziaWGは同じパッケージを運ぶ同じ宅配便ですが、チェックポイントごとに制服を変えます。同じ人、同じ貨物、全く異なる外観です。
バージョン履歴は重要です。AmneziaWG 1.xはWireGuardの固定値とは異なるカスタムヘッダーを導入しました — これは一時的に役立ちましたが、DPIシステムは適応しました。2025年末にリリースされたAmneziaWG 2.0は、すべてをランダム化します:ヘッダーはパケットごとに変わり、パディングはメッセージごとに異なり、代替パケットは実際のハンドシェイクが始まる前に他のプロトコルを模倣します。検出のための普遍的な署名は存在しません。なぜなら、各AmneziaWG 2.0サーバーは独自のパラメータセットを生成するからです。各サーバーは独自の方言を話します。
すべての難読化パラメータがゼロに設定されていると、AmneziaWGはWireGuardと同じように振る舞います — プロトコルレベルで完全に後方互換性があります。しかし、アクティブなパラメータ(デフォルト設定)を持つと、WireGuardができないものになります:DPIシステムが特定するのに苦労する高速VPNトンネルです。
では、AmneziaWGはどのようにトラフィックを暗号化するのでしょうか?DPIを盲目にする4つの難読化レベルを見てみましょう — そしてなぜそれらがほとんど速度コストを追加しないのかを説明します。
AmneziaWGがDPIから隠れる方法 (速度損失なし)
AmneziaWG 2.0は、DPIシステムがVPNトラフィックを特定するさまざまな方法をターゲットにした4つの難読化レベルを使用しています。これらはすべて一緒に機能します。各サーバーのトラフィックをユニークにします。
動的ヘッダー (H1–H4)
WireGuardは固定の32ビットメッセージタイプ識別子を使用します:
- 1 — イニシエーション用
- 2 — レスポンス用
- 3 — クッキー付きレスポンス用
- 4 — データ用
DPIデバイスはトラフィックをスキャンする際にこれらの値を探します。AmneziaWG 2.0は、各固定値を指定された範囲から選ばれたランダムな数に置き換えます。イニシエーションヘッダー(H1)は234567から345678の任意の値になります。レスポンスヘッダー(H2)は3456789から4567890の範囲です。これらの範囲は重複しません — プロトコルは内部でパケットタイプを区別する必要がありますが、外部の観察者にとっては、掴むべき単一のヘッダー値は存在しません。各パケットは前のものとは異なって見えます。
ランダムパディング (S1–S4)
WireGuardのイニシエーションパケットは常に正確に148バイトです。そのレスポンスは常に正確に92バイトです。これらの固定サイズは別の指紋です。AmneziaWGは各パケットタイプにランダムパディングを追加します:イニシエーションは148+S1バイト、レスポンスは92+S2バイト、クッキー付きレスポンスは64+S3バイト、各データパケットはS4バイトのパディングを受け取ります。S3とS4はバージョン2.0で新しく、S4はすべてのデータパケットに影響を与える最も重要な追加です。これにより、セッションレベルのトラフィック分析がはるかに難しくなります。
1つの重要な制約があります:S1+56はS2と等しくない必要があります。イニシエーションとレスポンスの元のサイズ差は56バイト(148−92)であるため、パディング値がちょうどその差をランダムに補償すると、2つのパディングされたパケットは同じサイズになり、AmneziaWGが排除しようとしている指紋を再現します。インストーラーのパラメータ生成器は自動的にこの制約を確保します。
カスタムプロトコル署名 (I1–I5)
実際のハンドシェイクが始まる前に、AmneziaWGクライアントは他のプロトコル — QUIC、DNS、SIP、またはカスタムバイトパターンを模倣する最大5つの代替パケットを送信します。サーバーはこれらのパケットを完全に無視します。実際のハンドシェイクを待つだけです。
- シンプルな構成:128バイトのランダムなバイトを送信<r 128>。
- 複雑な構成:QUIC接続を開始するように見えるバイトを送信(<b 0xc000000001><r 64><t>)、Unixタイムスタンプ付き。
DPIシステムがセッション開始を観察している場合、最初のパケットは通常のWebトラフィックのように見えます。
ジャンクパケット (Jc, Jmin, Jmax)
代替パケットの後、クライアントはカスタマイズ可能な数のジャンクパケットを送信します — JminからJmaxのランダムサイズの純粋なノイズです。これらのパケットはセッション開始のタイミングとサイズプロファイルをぼかし、DPIシステムが実際のハンドシェイクがどこから始まるのかを特定するのを難しくします。
速度に関する質問
インターネット上で流通している数字があります:AmneziaWGは65%のオーバーヘッドがあります。この数字は実際ですが、ユーザースペースのGo実装を指しており、カーネルモジュールではありません。このガイドで使用されるコミュニティインストーラーはDKMSカーネルモジュールを構築し、カーネルモジュールは全体で12%未満のオーバーヘッドを追加します — 実際のテストでは約3%です。検閲されていないネットワークでは、WireGuardで約95 Mbps、AmneziaWG 2.0で約92 Mbpsが見られます。検閲されたネットワークでは、比較は92 Mbps対ゼロです。
次の表は、インストーラーが自動的に生成するパラメータを要約したものです:
| パラメータ | 生成範囲 | 例の値 |
|---|---|---|
| Jc (ジャンクパケットの数) | 4–8 | 6 |
| Jmin (最小ジャンクサイズ) | 40–89 | 55 |
| Jmax (最大ジャンクサイズ) | Jmin+100からJmin+500 | 380 |
| S1 (イニシエーションパディング) | 15–150 | 72 |
| S2 (レスポンスパディング) | 15–150, S1+56≠S2 | 56 |
| S3 (クッキーパディング) | 8–55 | 32 |
| S4 (データパディング) | 4–27 | 16 |
| H1 (イニシエーションヘッダー範囲) | 重複のないuint32 | 234567-345678 |
| H2 (レスポンスヘッダー範囲) | 重複のないuint32 | 3456789-4567890 |
| H3 (クッキーヘッダー範囲) | 重複のないuint32 | 56789012-67890123 |
| H4 (データヘッダー範囲) | 重複のないuint32 | 456789012-567890123 |
| I1 (CPSパケット) | <r N>形式 | <r 128> |
これらのパラメータを手動で設定する必要はありません。インストーラーは、制約を満たす暗号的にランダムな値を毎回生成します。
難読化がどのように機能するかを理解したので、AmneziaWGが検討している代替手段とどのように比較されるかを見てみましょう。
AmneziaWGと代替手段 — 簡単な意思決定ガイド

| WireGuard | AmneziaWG 2.0 | OpenVPN+obfs4 | Shadowsocks | VLESS+Reality | |
|---|---|---|---|---|---|
| DPI耐性 | 低 | 高 | 中 | 中 | 非常に高い |
| 速度オーバーヘッド | 約4% | <12%(実際の条件で約3%) | 約25% | 約8% | 約10% |
| 完全なVPNトンネル | はい | はい | はい | いいえ(プロキシ) | いいえ(プロキシ) |
| カーネルで実行 | はい | はい(DKMS) | いいえ | いいえ | いいえ |
| セットアップの複雑さ | 低 | 低(インストーラー使用時) | 高 | 中 | 高 |
| トランスポート | UDP | UDP | TCP/UDP | TCP | TCP |
意思決定のルールは簡単です:
- あなたの国にDPIがないですか? 通常のWireGuardを使用してください。簡単で、より広いエコシステムがあります。
- 最大のDPI保護が必要で、プロキシを気にしないですか? VLESS+Realityは難読化に最も強力なオプションですが、完全なトンネルではありません。
- 速度と難読化を兼ね備えた完全なトンネルが欲しいですか? AmneziaWG 2.0は、WireGuardレベルのパフォーマンスを提供し、完全なVPNトンネル内で実際のDPI保護を実現する唯一のオプションです。
- すでにOpenVPN+obfs4を使用していて、まだ機能していますか? 切り替える緊急の必要はありませんが、AmneziaWGは明らかに速くなります。
この記事はAmneziaWGに焦点を当てています。なぜなら、完全なトンネル、カーネルレベルのパフォーマンス、組み込みの難読化を提供する唯一のプロトコルであり、すべてが単一のスクリプトで設定されるからです。
AmneziaWGがあなたの状況に適している場合、展開を開始する前に必要なものは次のとおりです。
開始前に必要なもの
インストーラーを実行する前に、環境がこれらの要件を満たしていることを確認してください:
| 要件 | 詳細 | 理由 |
|---|---|---|
| OS | Ubuntu 24.04 LTS(クリーンインストール)。Ubuntu 25.10は実験的です。Debian 12/13は動作しますが、curlが事前にインストールされている必要があります。 | インストーラーはUbuntu 24.04でテストされ、完全にサポートされています。 |
| VPS仕様 | 1 vCore、1 GB RAM、25 GBストレージ。$3–5/月の任意のプランが適しています。 | インストーラーはDKMSビルド中に約2 GBのディスクスペースと約1 GBのRAMを必要とします。動作するVPNは最小限のリソースを使用します。 |
| 仮想化 | KVM(OpenVZではなく、LXCではない)。 | AmneziaWGはDKMSを介してカーネルモジュールを読み込みます。LXCは共有ホストカーネルを使用し、カスタムモジュールを読み込むことができません。 |
| SSHアクセス | パスワード/キー認証を持つルートまたはsudoユーザー。 | インストーラーはルートとして実行する必要があります。 |
| SSHポート | デフォルト22または非標準ポートを使用している場合はUFWで事前に開放されている必要があります。 | SSHがポート22で実行されていない場合、事前に開放していないと、インストーラーのファイアウォール設定によってブロックされます。 |
| クライアントアプリケーション | Amnezia VPN >= 4.8.12.7(すべてのプラットフォーム)。 | AWG 2.0オプションは古いクライアントでは理解されません。標準のWireGuardクライアントはAWGを全くサポートしていません。 |
⚠️ 警告: LXCコンテナはサポートされていません。あなたのVPSがLXC仮想化を使用している場合、DKMSカーネルモジュールのビルドは失敗します。KVMまたはベアメタルを使用する必要があります。確信がない場合は、プロバイダーに確認してください。
⚠️ 警告: SSHが非標準ポート(22以外の任意のポート)で実行されている場合、インストーラーを実行する前にUFWでそれを必ず開放する必要があります:
sudo ufw allow YOUR_PORT/tcp
YOUR_PORTを実際のSSHポートに置き換えてください。インストーラーにはデフォルトポリシーでUFWが含まれています — SSHポートが許可されていない場合、すぐにブロックされます。
💡 ヒント: VPSを作成してから5〜10分待ってからインストーラーを実行してください。Cloud-initやバックグラウンド初期化プロセスが、インストーラーが行うapt-getの呼び出しと競合する可能性があります。
VPSが準備でき、前提条件が確認できたら、コミュニティインストーラスクリプトを使用してAmneziaWG 2.0を展開しましょう — これは最も迅速で透明な方法です。
方法1 — CLIインストーラーでデプロイ(推奨)
これは主要なインストール方法です。バージョン固定されたインストーラスクリプトをダウンロードし、ルートとして実行し、8つの自動化されたステップを通過し(2回の再起動が予想されます)、完全に構成されたAmneziaWG 2.0サーバーが得られます。インストーラーはすべてを処理します:パッケージのインストール、カーネルモジュールのコンパイル、ファイアウォールの設定、パラメータの生成、サービスの起動。
6.1 — SSH経由でVPSに接続
ターミナルを開き、サーバーに接続します:
ssh root@<SERVER_IP>
<SERVER_IP>をVPSの実際のパブリックIPアドレスに置き換えます。プロバイダーから非ルートユーザーが与えられた場合、そのユーザーでログインし、次に昇格します:
ssh <username>@<SERVER_IP>
 sudo -i
Ubuntu 24.04のウェルカムバナーの後にルートプロンプトが表示されるはずです:
Welcome to Ubuntu 24.04 LTS (GNU/Linux 6.8.0-xx-generic x86_64)
 ...
 root@vps:~#
6.2 — インストーラーをダウンロードして実行
インストーラスクリプトをダウンロードし、実行可能にし、実行します:
wget https://raw.githubusercontent.com/bivlked/amneziawg-installer/v5.8.1/install_amneziawg_en.sh
chmod +x install_amneziawg_en.sh
sudo bash ./install_amneziawg_en.sh
URLはv5.8.1にバージョン固定されています — 2026年4月時点での最新リリースです。これはサプライチェーンの安全性です:ダウンロードされたスクリプトがテストされたバージョンと一致することを保証します。リポジトリが更新されてもです。
インストーラーは最初にシステムをチェックします:
============================================
 AmneziaWG 2.0 Installer v5.8.1
 ============================================
 Checking system requirements...
 OS: Ubuntu 24.04 LTS — OK
 Virtualization: KVM — OK
 RAM: 1024 MB — OK
 Disk: 25 GB free — OK
チェックが失敗した場合、インストーラーは停止し、理由を教えてくれます。問題を修正してコマンドを再実行してください。
6.3 — インストーラープロンプトを通過する
インストーラーは8ステップの状態機械で、再起動後の再開をサポートしています。進行状況は/root/awg/awgsetup_cfg.initに保存されるため、サーバーが再起動しても、同じコマンドを再実行するだけで、途中から再開できます。
ステップ0: 初期化 — インストーラーはOS、仮想化タイプ、RAM、ディスクスペースをチェックします。/root/awg/作業ディレクトリを作成し、並行実行を防ぐためのロックファイルを設定します。
ステップ1: システムアップデート&パッケージインストール — インストーラーはapt-get update && apt-get upgrade -yを実行します。その後、AmneziaWG、DKMS、Linuxヘッダー、UFW、Fail2Ban、QRコード生成ツール、その他の依存関係をインストールします。
📝 注意: インストーラーは、最小限のVPSインスタンスでリソースを消費するいくつかのバックグラウンドサービスを削除します:snapd、modemmanager、networkd-dispatcher、unattended-upgrades、packagekit、lxd-agent-loader、udisks2。これは意図的であり、最小限のVPNノードには安全ですが、一般的な環境を壊す可能性があります。
ステップ1が完了すると、インストーラーは再起動を要求します:
Reboot required. Reboot now? [y/n]:
yと入力してEnterを押します。サーバーが再起動したら、再度SSHで接続し、同じコマンドを再実行します:
sudo bash ./install_amneziawg_en.sh
スクリプトは保存された状態を読み取り、再度プロンプトを求めることなくステップ2に進みます。
ステップ2: DKMSカーネルモジュールビルド — インストーラーは、現在のカーネルに対してAmneziaWGカーネルモジュールをコンパイルし、将来のカーネルアップデート時に自動的に再構築されるようにDKMSに登録します:
Step 2: Building AmneziaWG kernel module via DKMS...
 Creating symlink /var/lib/dkms/amneziawg/2.0/source -> /usr/src/amneziawg-2.0
 DKMS: add completed.
 Kernel preparation completed.
 Building module:
 make -C /lib/modules/6.8.0-xx-generic/build M=/var/lib/dkms/amneziawg/2.0/build modules
 DKMS: build completed.
 DKMS: install completed.
2回目の再起動が要求されます。yと入力してEnterを押します。
📝 注意: インストール中に2回の再起動があるのは正常で予想されることです。最初は新しいカーネルヘッダーを読み込み、2回目は新しく構築されたカーネルモジュールをアクティブにします。スクリプトは再起動間で状態を保存します — 何も失われません。
2回目の再起動後、再度SSHで接続し、インストーラーをもう一度実行します:
sudo bash ./install_amneziawg_en.sh
ステップ3: 再起動後のモジュール確認 — スクリプトはカーネルモジュールが読み込まれていることを確認します(lsmod | grep amneziawg)。DKMSビルドが何らかの理由で失敗した場合、ユーザースペースのGo実装にフォールバックし、高いオーバーヘッドについて警告します。
ステップ4: ファイアウォール設定 — UFWはデフォルトの拒否受信ポリシーで有効化されます。インストーラーはポート22でのSSHレート制限ルールを追加し、UDPトラフィック用にVPNポートを開放し、awg0インターフェースのルーティングルールを設定します。
ステップ5: 管理スクリプトのダウンロード — クライアント管理スクリプト(manage_amneziawg.shとawg_common.sh)が/root/awg/にオーナー専用の権限(700)でダウンロードされます。これらもv5.8.1にバージョン固定されています。
ステップ6: インタラクティブ設定 — インストーラーは今、4つの質問をします:
- UDPポート(デフォルト:39743、範囲1024–65535)。デフォルトはランダムな高ポートです — ISPが高いUDPポートをブロックすることで知られていない限り、そのままにしてください。
- トンネルサブネット(デフォルト:10.9.9.1/24)。これは内部VPNネットワークです。サーバーは.1を取得し、クライアントは.2から.254を取得し、最大253クライアントをサポートします。
- IPv6を無効にする(デフォルト:Y)。推奨 — IPv6を無効にすることで、IPv6ルートでトンネルの外にトラフィックが漏れるのを防ぎます。
- ルーティングモード:1を選択してすべてのトラフィック、2を選択してAmneziaリスト + DNS(推奨)、または3を選択してカスタムネットワークを選択します。モード2は、ブロックされた公的IP範囲とDNSのみをVPN経由でルーティングし、ローカルネットワークアクセスを迅速かつ直接に保ちます。
💡 ヒント: MTUはデフォルトで1280に設定されています。これは最小のIPv6 MTUであり、モバイルおよびセルラーネットワークにとって重要です。iOSはパスMTU発見に厳格であり、セルラーネットワークはしばしばWireGuardのデフォルトの1420未満の効果的なMTUを持っています。これを1280のままにしてください。
ステップ7: サービス開始 — インストーラーは/etc/amnezia/amneziawg/awg0.confにサーバー設定を生成し、/root/awg/に2つのデフォルトクライアント設定(my_phoneとmy_laptop)を作成し、QRコードを生成し、awg-quick@awg0のsystemdサービスを開始します。
ステップ8: 完了 — 成功メッセージが表示されます:

インストーラーはすべてのAmneziaWG 2.0難読化パラメータを自動的に生成します。これらに触れる必要はありません。各サーバーにはユニークな値のセットが与えられます — DPIシステムが検出するための普遍的な指紋はありません。
6.4 — インストール後のクライアント管理
/root/awg/manage_amneziawg.shの管理スクリプトは、すべてのクライアントライフサイクル操作を処理します。以下は重要なコマンドです:
新しいクライアントを追加:
sudo bash /root/awg/manage_amneziawg.sh add my_desktop
これにより、新しいクライアントの.confファイル、QRコード、および.vpnuriファイルが生成されます。サーバー設定はホットリロードされます — サービスの再起動は必要ありません。
一時的な自動期限切れクライアントを追加:
sudo bash /root/awg/manage_amneziawg.sh add guest --expires=7d
cronジョブが5分ごとにチェックし、期限が切れると自動的にクライアントを削除します。設定、キー、およびサーバーエントリはすべてクリーンアップされます。
すべてのクライアントをリスト:
sudo bash /root/awg/manage_amneziawg.sh list
Clients:
  my_phone     (10.9.9.2/32)
  my_laptop    (10.9.9.3/32)
  my_desktop   (10.9.9.4/32)
  guest        (10.9.9.5/32) [expires in 6d 23h]
追加の詳細(公開鍵や作成日を含む)には-vフラグを追加します。
クライアントを削除:
sudo bash /root/awg/manage_amneziawg.sh remove guest
サーバーの完全な状態を確認:
sudo bash /root/awg/manage_amneziawg.sh check
これにより、サービスの状態、開いているポート、すべてのAWG 2.0パラメータ、カーネルモジュールの状態、UFWの状態、Fail2Banの状態が1つのビューで表示されます。
クライアントごとのトラフィック統計を表示:
sudo bash /root/awg/manage_amneziawg.sh stats
Client          Received        Sent            Latest handshake
───────────────────────────────────────────────────────────────────
my_phone        1.24 GiB        356.7 MiB       2 minutes ago
my_laptop       892.3 MiB       128.4 MiB       15 seconds ago
my_desktop      0 B             0 B             (none)
バックアップを作成:
sudo bash /root/awg/manage_amneziawg.sh backup
これにより、サーバー設定、クライアント設定、キー、および有効期限データを含む圧縮アーカイブが/root/awg/backups/に作成されます。
📝 注意: addおよびremoveコマンドは、ホットリロードのためにawg syncconfを使用します。サーバー設定はサービスを再起動することなく即座に更新されます。ポートやMTUなどのサーバー側のパラメータを変更する場合にのみrestartを使用してください。
6.5 — サーバーが稼働していることを確認
すべてが稼働していることを確認するために、以下のチェックを実行します:
systemdサービスを確認:
sudo systemctl status awg-quick@awg0
● awg-quick@awg0.service - AmneziaWG Quick via awg-quick(8) for awg0
     Loaded: loaded (/lib/systemd/system/awg-quick@.service; enabled)
     Active: active (exited) since Thu 2026-04-09 14:32:01 UTC
AmneziaWGの状態とパラメータを確認:
sudo awg show awg0
ファイアウォールを確認:
sudo ufw status verbose
Status: active
Default: deny (incoming), allow (outgoing)
22/tcp                     LIMIT IN    Anywhere
39743/udp                  ALLOW IN    Anywhere
Fail2Banを確認:
sudo fail2ban-client status sshd
Status for the jail: sshd
|- Filter
|  |- Currently failed: 0
|  `- Total failed: 0
`- Actions
   |- Currently banned: 0
   `- Banned IP list:
DKMSカーネルモジュールを確認:
dkms status
amneziawg/1.0.0, 6.8.0-110-generic, x86_64: installed
すべての5つのチェックが合格すれば、あなたのAmneziaWG 2.0サーバーは稼働しており、接続を受け入れる準備が整っています。
サーバーは稼働しており、確認されました。ターミナルの代わりにGUI駆動のアプローチを好む場合は、AmneziaVPNアプリを使用した代替方法があります。
方法2 — AmneziaVPNアプリでデプロイ(代替)
AmneziaVPNデスクトップアプリケーションは、SSH経由でサーバーにAmneziaWGを自動インストールできます。CLIメソッドと同じ基盤となるインストーラスクリプトを使用しますが、すべてをガイド付きインターフェースにラップします。これは、手間のかからないインストール体験を求める場合に最適です。
- AmneziaVPNをダウンロード amnezia.org/en/downloadsから。Windows、macOS、Linux、Android、iOS用に利用可能です。
- アプリを開くと➕(プラスアイコン)または始めるをクリックします。
- 提示されたオプションから「セルフホストVPN」を選択します。
- サーバーの認証情報を入力:
- サーバーIPアドレス(SSHが22でない場合はポートも、例:203.0.113.10:2221)
- SSHユーザー名(例:root)
- パスワードまたはSSHプライベートキー
- インストールタイプを選択:
- 自動 — AmneziaWGのみをインストール(推奨)
- 手動 — リストから特定のプロトコルを選択
- 「インストール」をクリック — アプリがSSH経由でサーバーに接続し、自動的にインストールを実行します。進行状況インジケーターが表示されます。
- インストール後、アプリが使用可能なVPN接続プロファイルを作成します。
インストール後の注意:
- アプリはデフォルトでランダムなポートでAmneziaWGをインストールします。一部のISPは高ポートでのUDPをブロックします。アプリは9999未満のポート(585や1234など)への変更を推奨します。変更するには:接続の隣にある歯車アイコンをクリック → 管理タブ → ポート番号を変更します。
- サーバーにすでにAmneziaソフトウェアがインストールされている場合、接続作成中に「設定をスキップ」をクリックし、その後管理タブで「以前にインストールされたAmneziaサービスをサーバーで確認」を使用します。
以下は、2つの方法の比較です:
| 側面 | CLIインストーラー | AmneziaVPNアプリ |
|---|---|---|
| 制御 | 完全 — すべてのステップが見え、カスタマイズ可能 | 制限された — アプリがすべてを処理 |
| 可視性 | 透明 — すべてのコマンドが表示される | 不透明 — 背後で実行される |
| 柔軟性 | カスタムルーティング、エンドポイント、フラグ | デフォルトのみを使用 |
| 使いやすさ | SSHの知識が必要 | ターミナル作業ゼロ |
| 管理 | 完全manage_amneziawg.shスイート | アプリベースの管理のみ |
| 最適 | 管理されていないVPS、トラブルシューティング | 迅速なセットアップ、ガイド付き体験 |
CLIまたはアプリを使用した場合、サーバーは準備が整いました。次に、最初のデバイスを接続しましょう。
最初のクライアントを接続する
インストール後、Amnezia VPNアプリにクライアント設定をインポートする方法は3つあります。デバイスに合った方法を選択してください。
方法A: QRコード(モバイル)
インストーラーは/root/awg/my_phone.pngにQRコードを生成しました。それをコンピュータにダウンロードします:
scp root@<SERVER_IP>:/root/awg/my_phone.png .
PNGファイルを画面に表示します。携帯電話でAmnezia VPNアプリを開き、「VPNを追加」 → 「QRコードをスキャン」をタップし、カメラを画面のQRコードに向けます。接続が自動的にインポートされます。
方法B: vpn:// URI(Amneziaクライアント)
サーバーで圧縮されたURIを表示します:
cat /root/awg/my_phone.vpnuri
全体のvpn://…文字列をコピーし、自分に送信します — Telegram、メール、またはメモアプリを介して。携帯電話でAmnezia VPNアプリを開き、「VPNを追加」 → 「クリップボードから貼り付け」をタップします。設定が1ステップでインポートされます。
URIは、フル設定ファイルのzlib圧縮、Base64エンコードバージョンです。コンパクトで迅速な共有のために設計されています。
方法C: .confファイル(デスクトップ/Windows)
設定ファイルをダウンロードします:
scp root@<SERVER_IP>:/root/awg/my_phone.conf .
AmneziaWG for WindowsクライアントまたはAmneziaVPNデスクトップアプリを開き、「ファイルからトンネルをインポート」をクリックし、.confファイルを選択します。
接続を確認
接続後、トンネルがサーバーを通じてトラフィックをルーティングしていることを確認します:
curl ifconfig.me
出力には、ローカルではなくサーバーのパブリックIPアドレスが表示されるはずです:203.0.113.1
詳細を確認するには、サーバーの地理的位置を含めて:
curl -s https://ipinfo.io/json
{
  "ip": "203.0.113.1",
  "city": "Amsterdam",
  "region": "North Holland",
  "country": "NL",
  ...
}
⚠️ 警告: 標準のWireGuardクライアントはAmneziaWG 2.0設定では動作しません。Amnezia VPNアプリ(バージョン4.8.12.7以降)またはネイティブのAmneziaWGクライアント(Windows/Android/iOSでバージョン2.0.0以降)を使用する必要があります。
⚠️ 警告: Windowsで「無効なキー:s3」が表示された場合、AmneziaWG Windowsクライアントが古い(バージョン2.0.0未満)です。バージョン2.0.0+に更新するか、Amnezia VPNアプリに切り替えてください。
💡 ヒント: 接続されているがインターネットがない場合、クライアント設定にMTU = 1280が[Interface]セクションに含まれていることを確認してください。これは、モバイルネットワークで「ハンドシェイクが成功するがトラフィックがない」の最も一般的な原因です。
おめでとうございます!あなたのVPNトンネルは機能しています。
次に何をするか — セットアップを拡張する
あなたは今、DPI耐性のあるVPNトンネルを自分のサーバー上で稼働させており、あなたの制御下にあります。WireGuardレベルの速度で。あなたのWireGuard接続を殺した静かなパケット死亡はもはや問題ではありません — あなたのトラフィックはDPIシステムが信頼性を持って特定できるものとは何も見えません。
次にできる最も便利なことは以下の通りです:
- 家族やチームのためにクライアントを追加 — 管理スクリプトを使用して、アクセスが必要なすべてのデバイスの設定を生成します。
- フルトンネルルーティングが必要ない場合はスプリットトンネリングを設定 — これによりローカルトラフィックが迅速になり、VPSの帯域幅が削減されます。
- 設定をバックアップ — バックアップコマンドを実行し、安全な場所にアーカイブを保存します。サーバーを再構築する必要がある場合、これがあなたをゼロから始めることから救います。
フルトンネルを通じてすべてのトラフィックをルーティングする必要がない場合はスプリットトンネリングを設定します。これは特に部分的な検閲のある国で便利です — ブロックされたサイトのみをトンネル経由でルーティングし、ローカルトラフィックを直接保ちます:
sudo bash /root/awg/manage_amneziawg.sh modify my_phone AllowedIPs "192.168.1.0/24,10.0.0.0/8"
異なるリゾルバーを好む場合はクライアントDNSを変更:
sudo bash /root/awg/manage_amneziawg.sh modify my_phone DNS "8.8.8.8,1.0.0.1"
攻撃的なNAT設定を使用している場合はPersistentKeepaliveを調整します。デフォルトの33秒は、NATを通じてUDPセッションを維持します — 25に下げることで、アイドルUDPセッションをすぐにドロップするネットワークで助けになることがあります:
sudo bash /root/awg/manage_amneziawg.sh modify my_phone PersistentKeepalive 25
ルーターにインストールしてネットワーク全体をカバーします。AmneziaWGは、AWG Managerを介してKeeneticルーターで、Merlin用のAmneziaWGを介してASUSルーターでサポートされています。
設定を今すぐバックアップします。何かが変わる前に:
sudo bash /root/awg/manage_amneziawg.sh backup
新しいサーバーに移行する必要がある場合、クリーンインストールを実行し、その後:
sudo bash /root/awg/manage_amneziawg.sh restore
 sudo bash /root/awg/manage_amneziawg.sh regen
restoreコマンドは設定とキーを復元し、regenは新しいサーバーIPでクライアント設定を更新します。
より詳細なドキュメントについては、公式のAmneziaドキュメントはdocs.amnezia.orgにあり、コミュニティはTelegramで活発です。
結論
完全なセットアップを経て、AmneziaWG 2.0の際立った点は、単に機能するだけでなく、他のものが失敗するところでなぜ信頼性があるのかということです。WireGuardの証明された暗号コアを保持しながら、トラフィックがネットワーク上でどのように見えるかを根本的に変えることで、深層パケット検査が利用する正確な弱点を回避します。その結果、実際にはWireGuardと同じように高速でシンプルに感じられるセットアップが得られますが、敵対的な環境でははるかに耐性があります。展開されると、その価値は明らかになります:あなたは単にVPNを運営しているのではなく、実際のブロッキングに耐えるように構築されたVPNを運営しています。
AmneziaWGサーバーをホストするための信頼できるVPSを探している場合、またはチームメンバーのために追加のエンドポイントをスケールアップする必要がある場合は、AvaHostが提供するKVM仮想化、完全なルートアクセス、NVMeストレージ、およびこのセットアップに必要なUbuntu 24.04サポートがあります。彼らのインフラストラクチャは、このガイドがカバーする自己ホスト型展開のために特別に構築されています。