English





How to Buy and Deploy a Self-Hosted App on AVA HOST
AVA HOST Cloud Apps let you run self-hosted applications without installing and configuring the underlying server yourself. This guide walks through the complete process: purchasing a suitable plan, deploying an app from your account dashboard, and opening the app for the first time. We use n8n as the example, but the same general flow applies to other apps in the catalog.
Part 1: Purchase a Cloud Apps Plan
1. Choose an app from the catalog
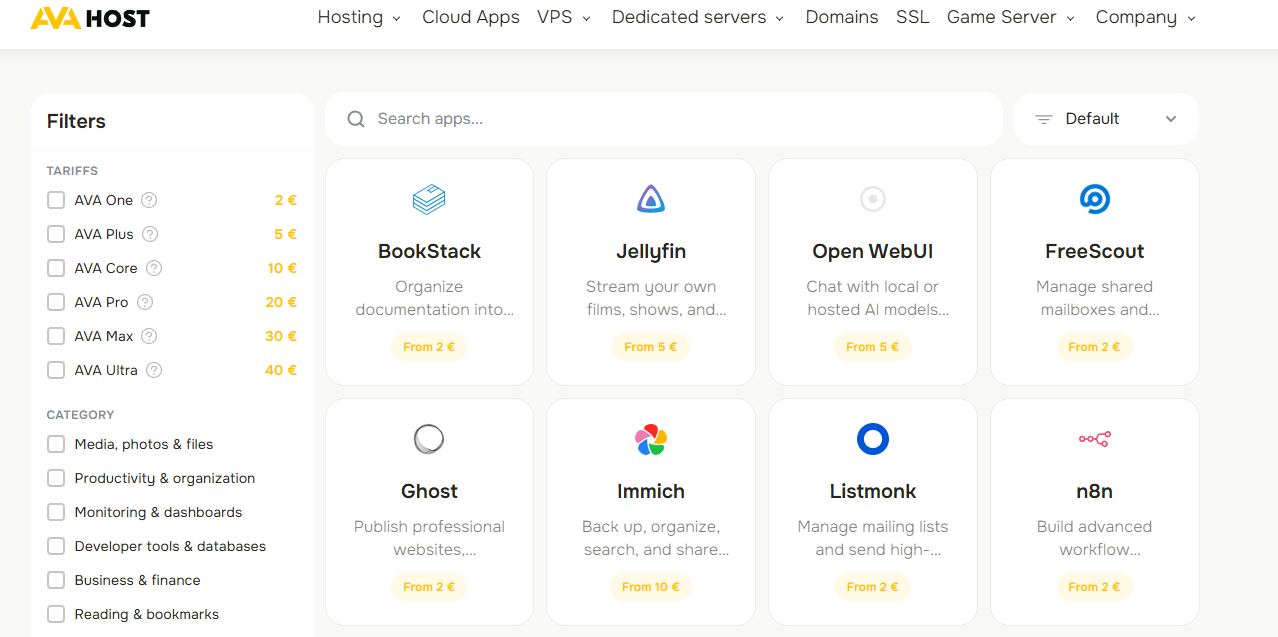
Open the AVA HOST Cloud Apps catalog. Browse the available apps or use the search bar, category filters, and plan filters to narrow the list.
Each card shows the app’s starting price. Select the app you want to host. In this guide, we will choose n8n.
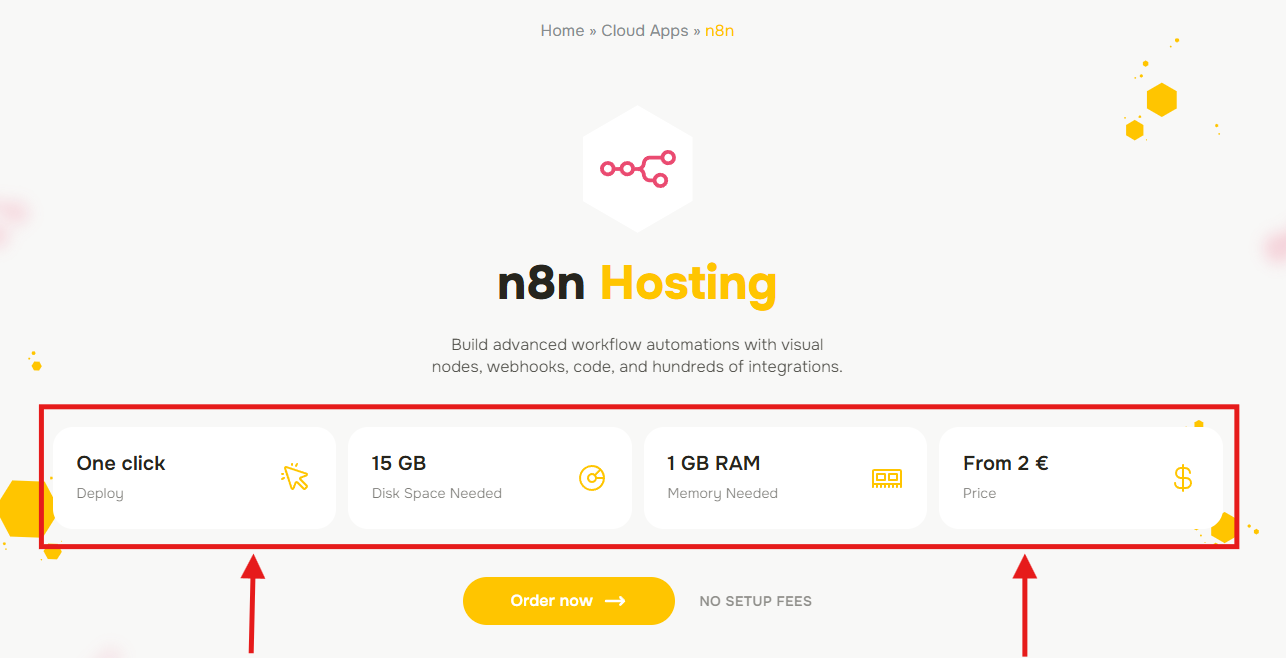
2. Review the app requirements and starting price
The app page summarizes what the application does and the minimum resources it needs, including disk space and memory. It also shows the starting price for a compatible plan.
AVA HOST selects the minimum recommended plan by default. Apps with higher hardware requirements may need a larger plan and therefore have a different starting price. Review the information, then click Order now.
3. Select a plan
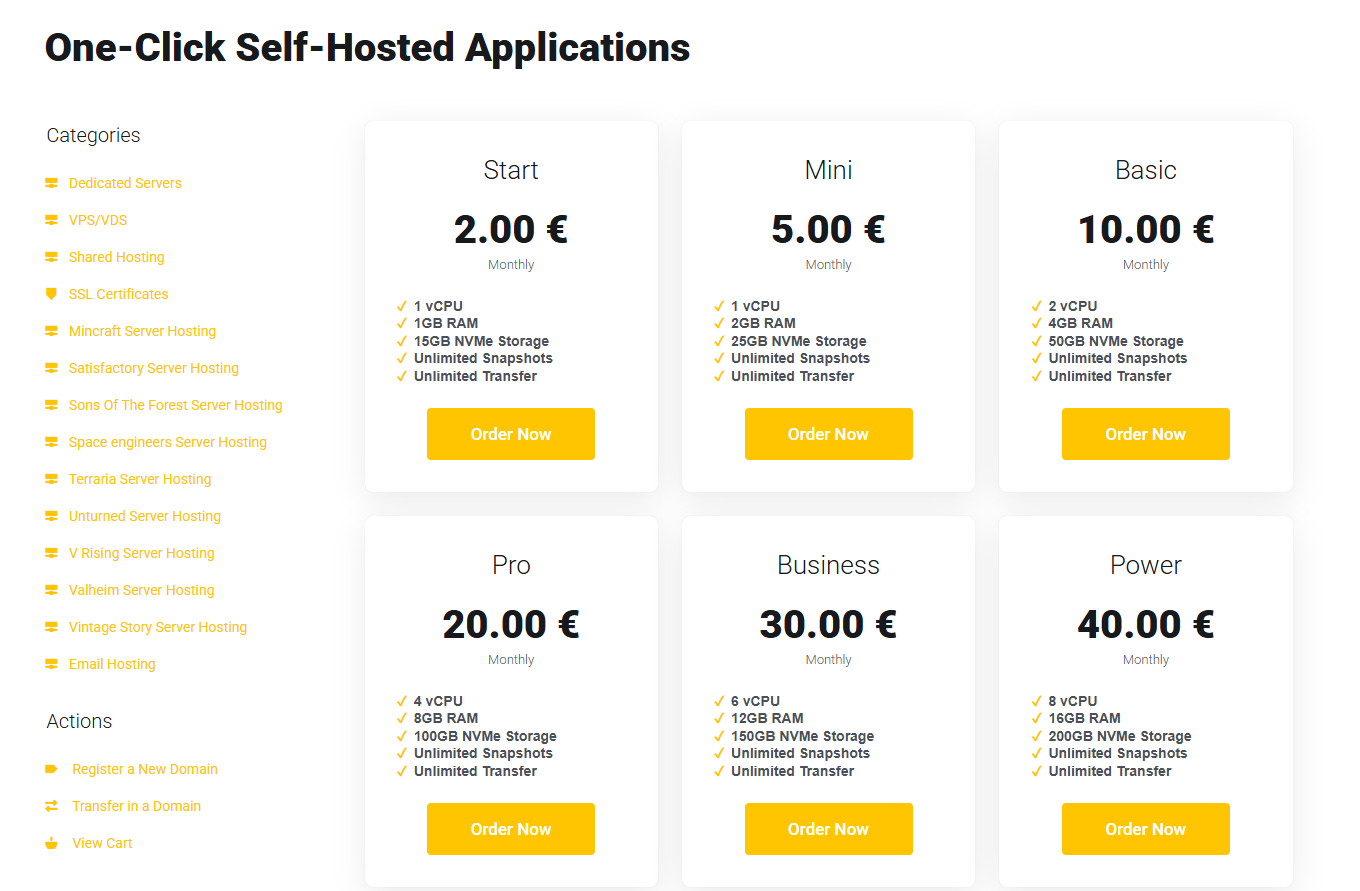
On the billing page, compare the available plans and their included CPU, RAM, and storage. The plans shown may vary depending on the selected application’s requirements.
Choose the plan that fits your expected workload and click Order Now. For a small n8n deployment, the Start plan is the entry-level option shown in this example.
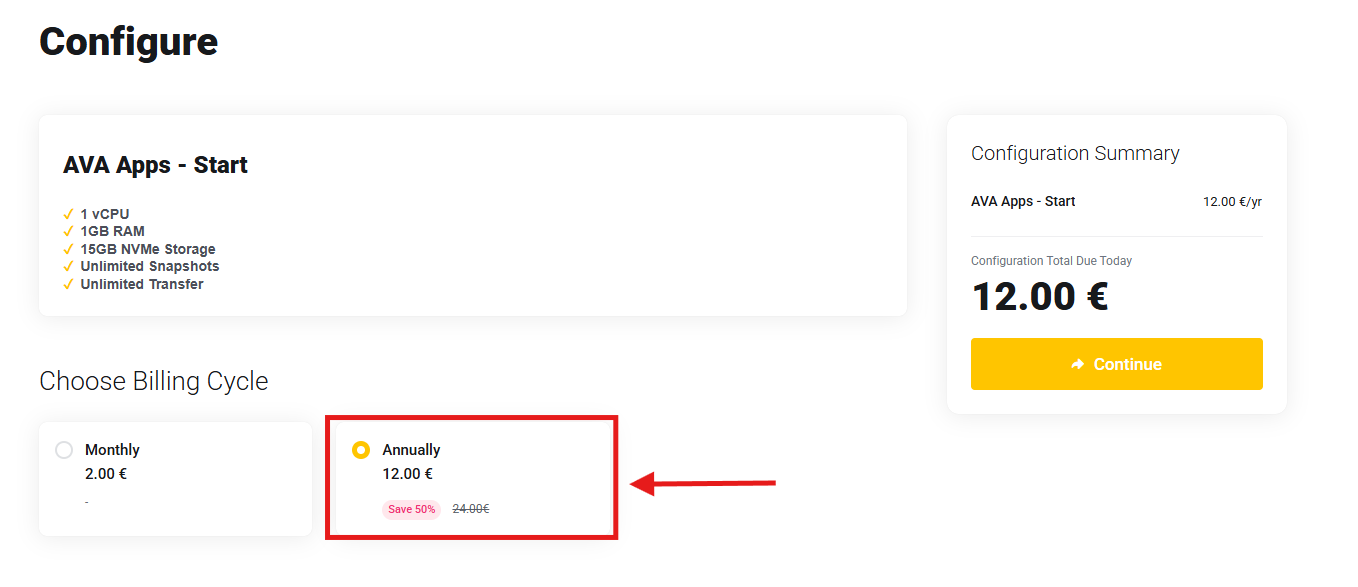
4. Choose a billing cycle
Select your preferred billing cycle. Depending on the current offer, annual billing may provide a lower effective monthly price. In the example below, you can get the Start plan for just EUR 12 for the entire year under the displayed annual offer.
Check the configuration summary and amount due, then click Continue.
Note: prices and discounts can change. Use the amount shown in your configuration summary as the current price for your order.
5. Review and place the order
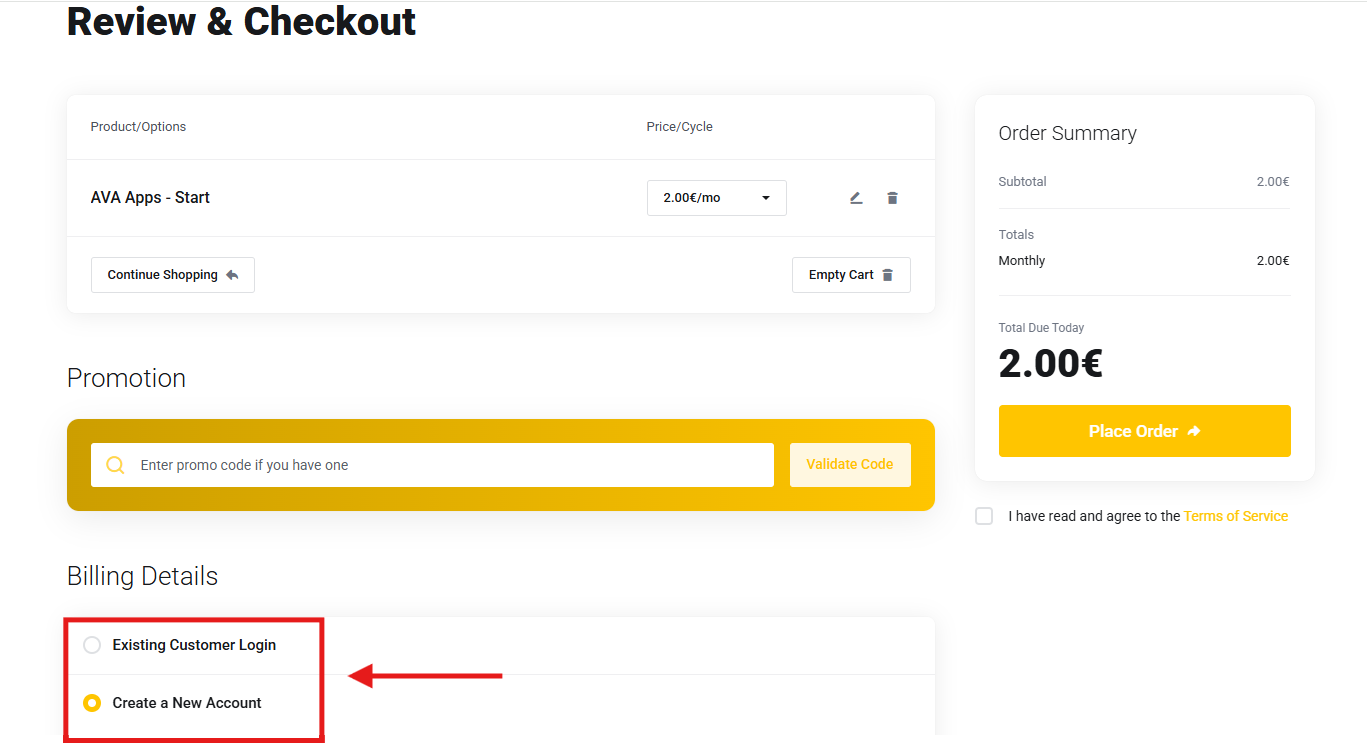
On the Review & Checkout page:
- Confirm the selected product, billing cycle, and total due.
- Enter and validate a promotion code if you have one.
- Sign in as an existing customer or create a new account by completing the billing details.
- Read and accept the Terms of Service.
- Click Place Order and complete the requested payment steps.
Your Cloud Apps plan is now associated with your AVA HOST account. You can use its capacity to deploy your application.
Part 2: Deploy and Access the App
1. Start a deployment from the dashboard
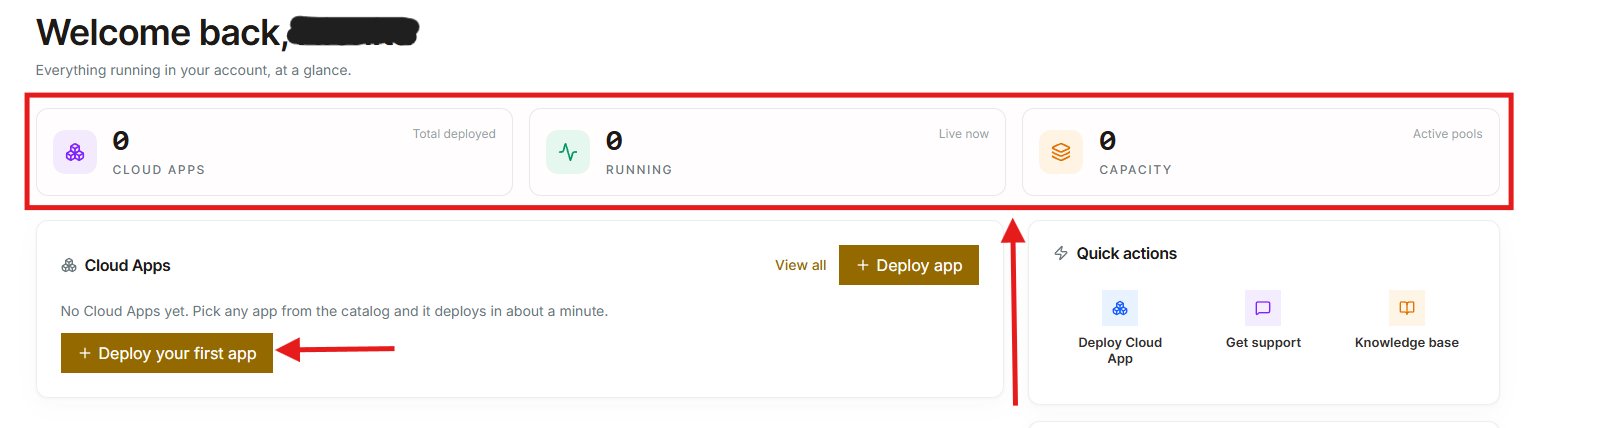
Sign in to the AVA HOST Cloud Apps dashboard. The summary at the top shows:
- Cloud Apps: the total number of deployed apps.
- Running: the number of apps currently running.
- Capacity: the capacity pools available in your account.
To begin, click Deploy your first app. If you have already deployed an app, use Deploy app instead.
2. Choose the app
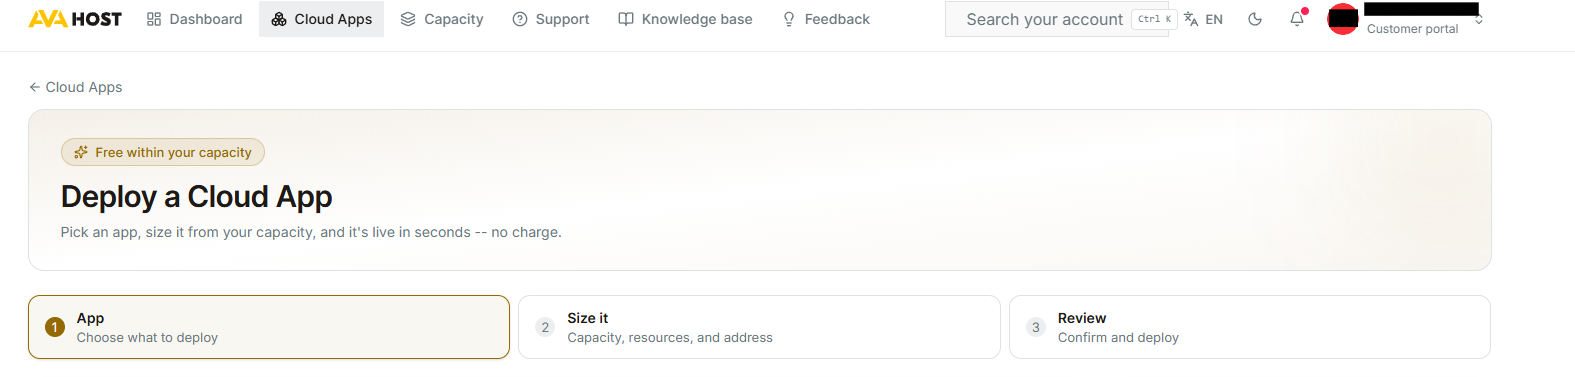
Deployment follows three steps: App, Size it, and Review.
In the first step, choose the application you want to deploy. Select n8n for this example, then click Continue.
3. Size the app
Select capacity and location
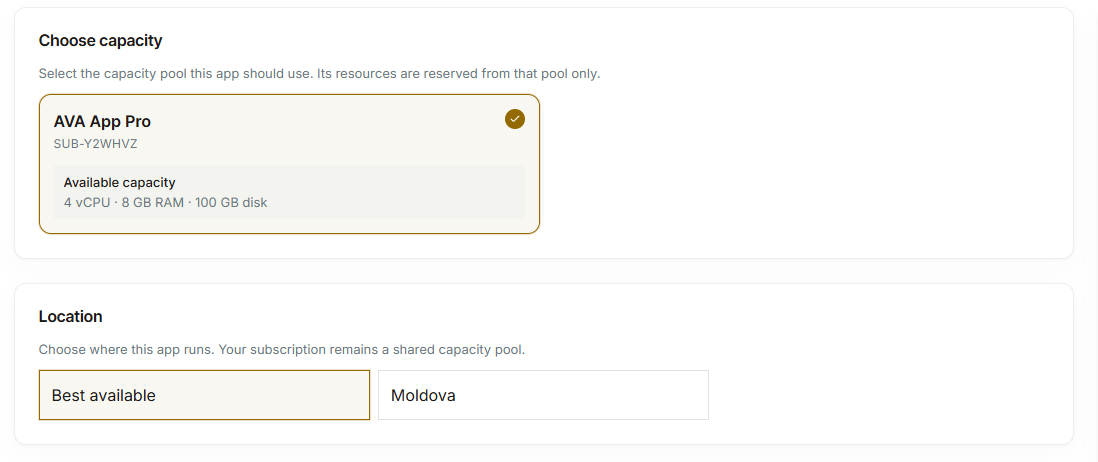
In the Size it step, select the capacity pool that should provide resources to the app. This pool comes from the plan purchased in Part 1. The available CPU, RAM, and disk space are displayed on its card.
Next, choose where the app should run. You can leave Best available selected or choose a listed location when that option is available.
Allocate hardware resources
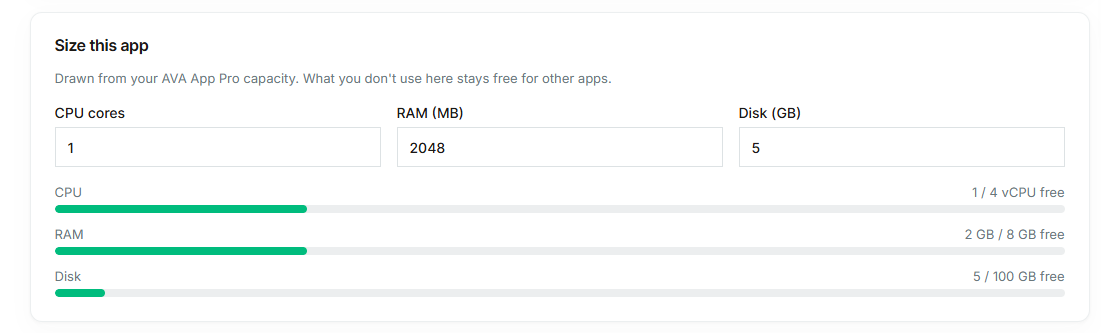
Set the number of CPU cores and the amount of RAM and disk space for the app. The usage bars show how much of the selected capacity pool this deployment will consume and how much will remain for other apps.
For this n8n example, the deployment screen uses 1 vCPU, 2 GB RAM, and 5 GB disk space. Treat these as example values rather than universal requirements: compare them with the current requirements on the app page and follow any minimums or validation shown in your dashboard before continuing.
Set the app name and address
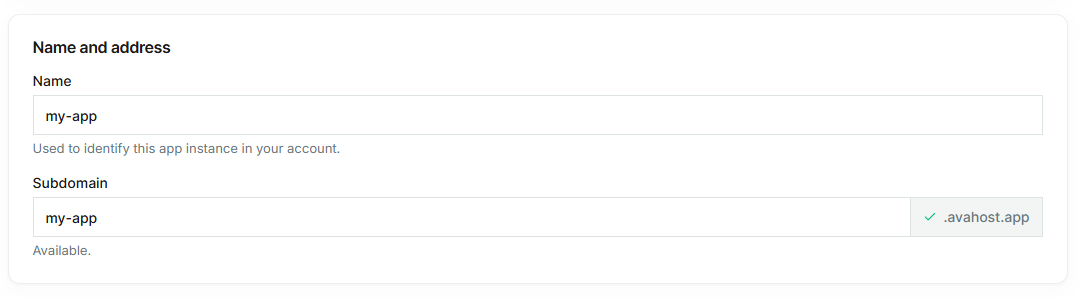
Enter a recognizable name for the app instance. Then choose an available subdomain, which will become the app’s address under avahost.app.
The example below uses the name my-app and the address my-app.avahost.app. When both fields are ready, click Continue.
4. Review and deploy
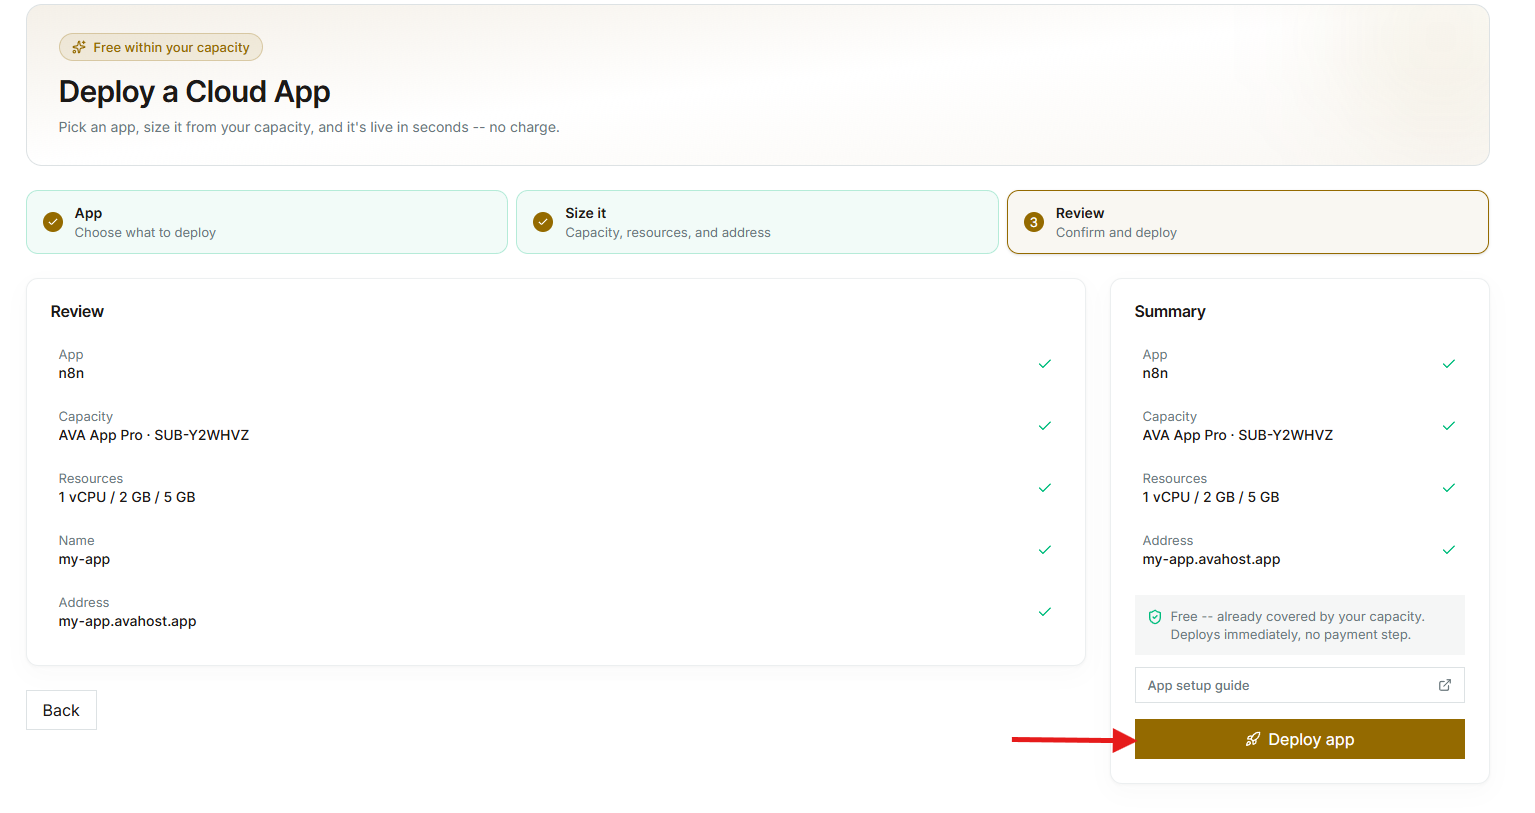
Review the selected app, capacity pool, allocated resources, name, and address. If everything is correct, click Deploy app.
The deployment uses resources from your existing capacity, so there is no additional payment step at this stage.
5. Wait for the deployment email
AVA HOST now installs and starts the app. Deployment time depends on the application, so it may take a few minutes before the app is ready.
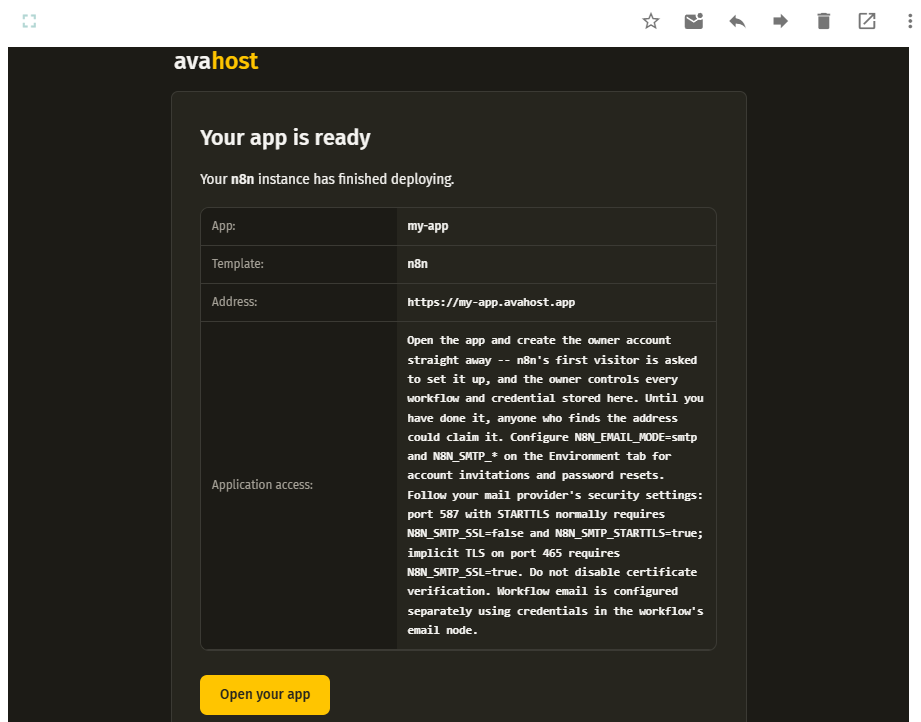
When deployment finishes, AVA HOST sends a confirmation email to the address connected to your account. This email contains the app URL and application-specific setup or access instructions. Read these instructions before opening the app.
For n8n, the first visitor must create the owner account. Open the app promptly and complete this step so that access is secured.
6. Open the app and complete its setup
Click Open your app in the email or open the provided address directly. Follow the application’s on-screen setup process.
In n8n, the first page asks you to create the owner account by entering an email address, first name, last name, and password. Other applications may show a different login or initialization screen, so always follow the instructions in your AVA HOST email.
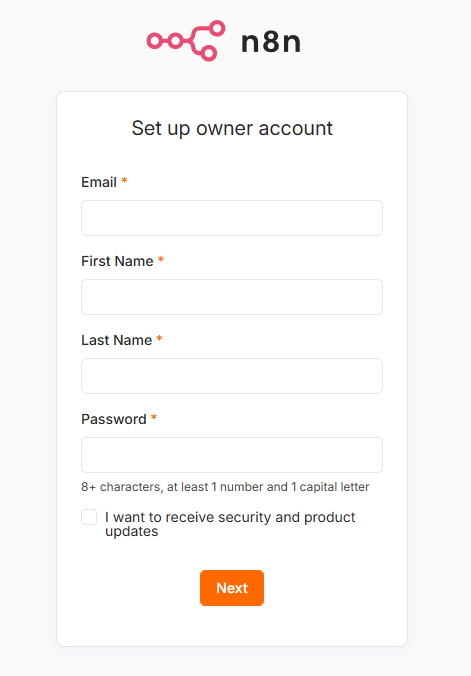
After completing the app’s setup, use its AVA HOST address and the credentials you created or received whenever you want to sign in.
7. Manage the deployed app
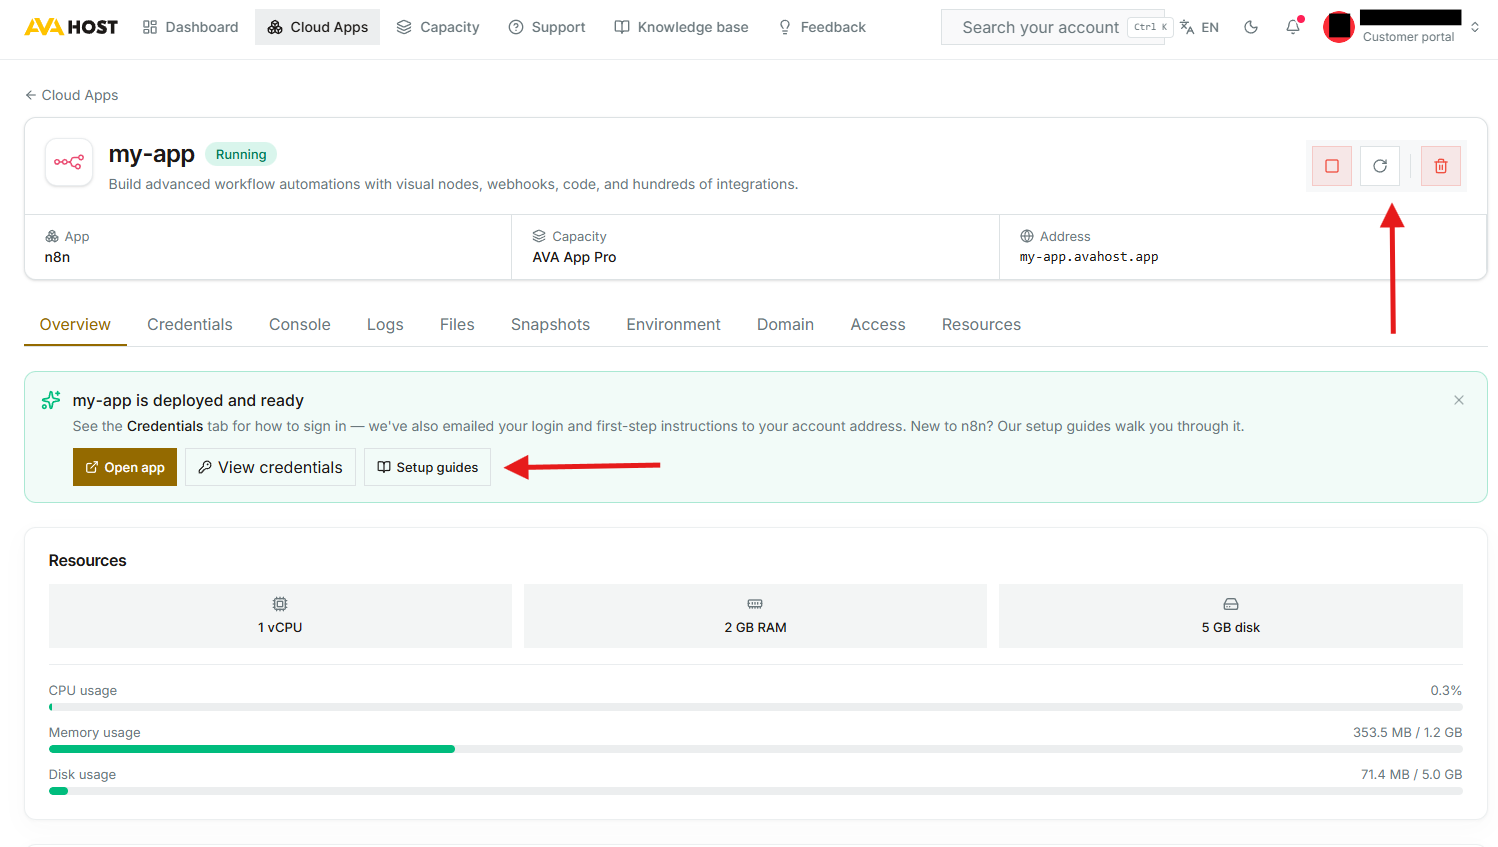
Return to Cloud Apps in the AVA HOST dashboard and select your app to manage it. The app page shows its status, address, assigned capacity, and current resource usage. It also provides controls to stop, restart, or delete the deployment.
Depending on the application and account configuration, you can also use the available tabs to view credentials, open the console, inspect logs and files, create snapshots, manage environment variables and domains, adjust access, and review resources. Use Open app to launch the application and Setup guides for app-specific help.
Share Your Feedback and Ideas
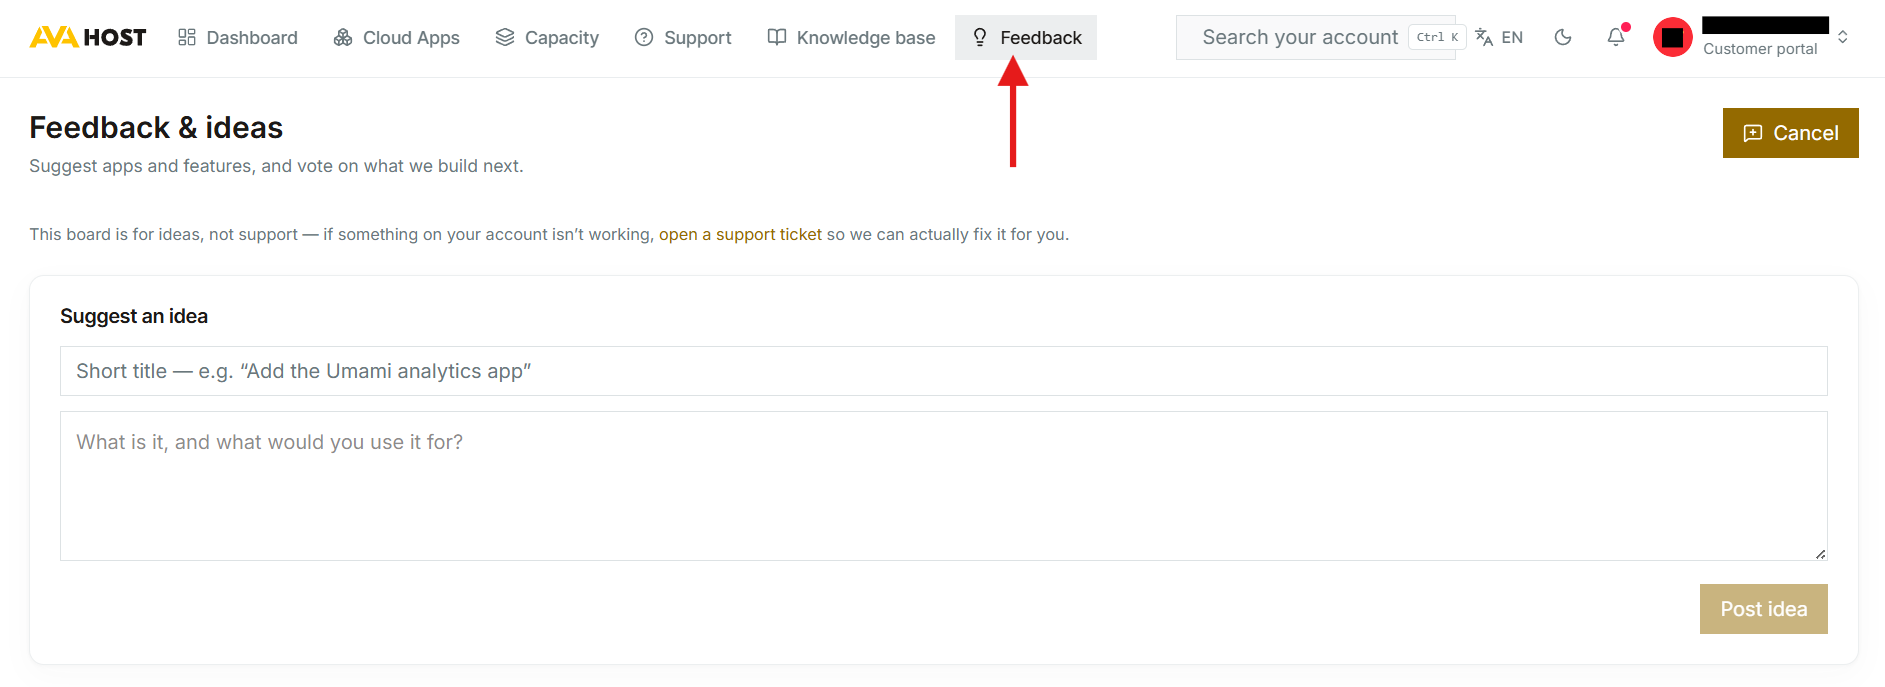
Have an app or feature you would like to see? Select Feedback in the dashboard navigation to suggest new apps and features, share how you would use them, and vote on ideas you would like AVA HOST to build next.
Note: This board is intended for ideas and product feedback. If you need help with something that is not working on your account, open a support ticket instead.
You’re All Set
Your self-hosted app is now deployed and accessible. Keep the deployment email for app-specific instructions, and use the AVA HOST dashboard whenever you need to monitor or manage the instance.
Related Posts